
 I develop sites for clients on my own host server which happens to be HostMonster. Been with them for years and haven’t had any problems, so while there are cheaper options, I figure why fix something that isn’t broken. When working for a client I share the url for their test site so they can view and approve the work. When the site it completed I move it to their server.
FYI – I’ve been recommending PowWeb most of the time for small business sites because they have good prices. When you go to sign up you should leave the sign-up page at least once because PowWeb often will offer a lower price if you’ll stay on the page. After you signed up they will contact you and usually offer extended deals. I’ve been setting up clients for 3 years hosting at less the $125. I find their interface intuitive, they aren’t constantly trying to gouge you for add-ons like GoDaddy (I would never use them), and when I call for technical support I am not on hold for a long time and they are extremely helpful. I love their tech support.
Because I haven’t moved a site in a while I looked at the WordPress Codex for direction and found their Codex less than thorough. Sometimes is seems like people don’t take into account the different levels of experience and if you have to perform brain surgery they offer directions like Step 1. Perform the surgery, Step 2. Finish the surgery. Oh gee, thanks. I think I need to know a tad more than that. Feel free to peruse their instructions.
Since I flogged my way through it today I thought I would write it up to make it a little easier for myself next time and maybe help some others. Keep in mind that everything changes – WordPress, MySQL, host servers – so while these directions worked perfectly today, they may need variations somewhere down the road.
If you would like to change hosting and not have to reinvent the wheel, this really isn’t that bad of a process if you’re new to it. You’ll need:
- Text editor
- FTP software like Filezilla
- Safe Search Replace (where to find it is in the directions)
- access to your old host server
- access to your new host server
- at least a basic knowledge of MySQL or an adventurous spirit
- at least a basic knowledge of phpMyAdmin or an adventurous spirit
If you’re already scratching your head wondering what the heck all these are, you might want to get help before proceeding. I’m completely self-taught, but there’s always the risk of really buggering things up. I choose to live with that risk — you may not.
Making the move
Warning 1: Make sure you have a backup of your old blog’s WordPress database before proceeding!
Here’s a PDF of these instructions if you’d like to print it out.
Part A – Moving WP Files and Database from old hosting to new hosting
This will involve getting the old WP files and database onto your local computer and then uploading it onto the new server. This is a little redundant, but I would rather err on the side of caution so don’t skip steps. It may save your butt later.
1. Download WordPress installation: Download a backup of your entire WordPress installation (all the WP files from the old site) to your hard drive. Name a folder something appropriate to indicate this is your OLD blog (I use FileZilla to FTP files back and forth from my computer to the hosting service).
2. Export a backup of your database: Export a backup of your database to same OLD blog folder. This will be a .sql file or a .zip if you compressed a large database. While logged into your old hosting server use MySQL, go to phpMyAdmin, select your database (not one of the tables) in the left hand column, go to Export Tab, depending on the phpMyAdmin interface you will either:
a. Leave “Quick – display minimal options” checked and simply click Go and it will let you name the download

b. or you will need to leave everything as is and go to bottom of screen, check “Save as file”, then click Go and save your file.

This is your safety net. Make sure you keep it safe and don’t overwrite the files!
3. Change URLs in old blog: Log into your OLD blog on the old server and go to SETTINGS and change the url for both WordPress Address (URL) and Site Address (URL) to the URL for the site on the new server. You will not be able to log into WP on your old site after this.
Time to get the files that will go to the new server.
4. Download your entire WordPress installation: After changing the URLs in the WP Settings, download your entire WordPress installation AGAIN (all the WP files from the old site) to your hard drive and name a new folder appropriately to indicate that this is your NEW blog’s installation files.
5. Export your database: Export your database once again (but keep the old one safe) using same instructions as Step 2 and put this export in the same folder as the newly downloaded WordPress installation.
6. Create a new database: This process varies among hosting servers so I can’t offer images. Go to your new host server and create a new database in MySQL. It will be easiest if you use the same DB_NAME, DB_USER, and DB_PASSWORD as on the old server. If you are unsure what they are, go to the wp-config.php in the WordPress installation files and verify it. If you change them be sure to note down the EXACT ones you use.
7. Import the database: Import the database export you got from the old server to the newly created database on the new server using phpMyAdmin/Import. Choose file (newly exported database in new blog folder), leave all other settings the same, and click Go.

8. Using a different database name/user/password: If you used a different database name and/or user (see previous step), edit wp-config.php in your NEW blog’s installation folder appropriately. I use Notpad++ for editing files and love it. And it’s free 🙂 (Be aware that using the Windows notepad can embed unwanted code that will not work sometimes. Never use word processing software.)
a. Make sure DB_NAME, DB_USER, and DB_PASSWORD match what you set up when you created the new database on your new hosting server.
b. Upload this file to the WP directory on your new hosting server.
Part B – Changing URLs in Database
The use of Safe Search Replace was recommended by WordPress in the Codex so I thought I’d give it a try. Wow — talk about painless. Just make sure you give it the correct information to avoid GIGO (garbage in garbage out).
1. Download Safe Search Replace.
2. Change the name of Safe Search Replace searchreplacedb2.php to something else. I used “url-rename.php” (changing the name is recommended by them because apparently hackers look for this file so they can hack your site).
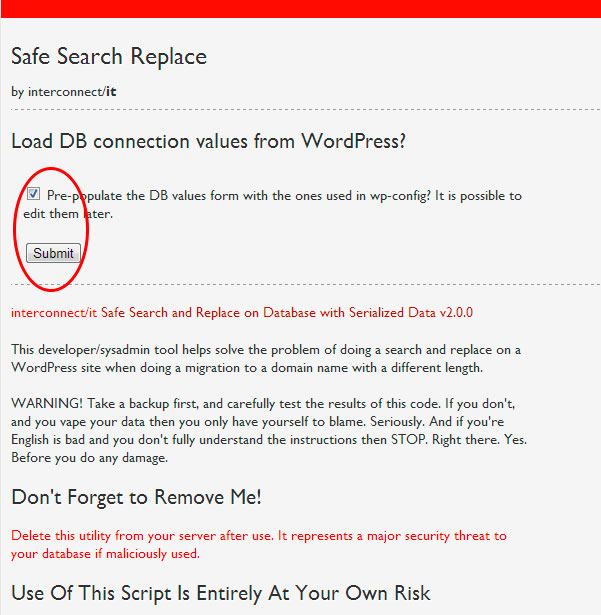
3. Go to Safe Search Replace by entering www.your-url.com/url-rename.php or whatever you named the .php file. I left Pre-populate checked and clicked submit (Note the “Don’t forget to remove me” reminder near the bottom of the image).
4. Enter database information: The next screen will ask for the following information (I didn’t get a screenshot of this):
Your Server Name:
Database Name:
Database Username:
Database Password:
I went to PowWeb/CPPanel/MySQL – choose database – generate code option on right to verify the values for Safe Search Replace. Where this is located will vary in different host servers and may require a call to tech support to make sure you have the right information. Make sure this is correct. Don’t be afraid to call tech support — that’s what you pay for. If you’re brand new to this tell the person you speak to so they can break it down to terms you understand.
While you’re at it, make sure you have corrected wp-config.php. Pull it up in an editor and verify.
5. Changing urls: When asked what to find and replace enter old url and new url (I didn’t get a screenshot of this):
www.old-url.com
www.new-url.com
Let the program do its magic.
6: DELETE the url-rename.php (or whatever you called the php file) or sneaky, dishonest people will use it.
Congratulations!
That’s it. You should be able to type in the new URL and the site will come up just as it appeared on the old host server with all the posts, images, and pages. Go to wp-admin and enter the same user and password as on the old server and you can edit the site.
Pretty painless, all things considered. Moving the WordPress Installation files is a piece of cake, using Safe Search Replace made moving the database a piece of cake as well.
If you have basic questions, email me and I’ll see if I can help.


