Category: Household Tips

Household Tips for Cleaning and Organizing

  • Have a bathroom exhaust fan or heater?

    Have a bathroom exhaust fan or heater?

    I have two words — CLEAN IT.

    I recently purchased a foreclosure that had two bathrooms with a fan/heater/light. One was brand new. One was an original antique from when the house was built in 1987 and had a non-functioning heater so I ordered a new unit from Amazon.

    In preparation for the arrival of the new unit I started to disassemble the old one. This was after vacuuming the old unit out trying to see if I could get it working.

    Once I got it apart the thing was beyond disgusting, beyond belief. I didn’t think dust could cake on that thick — doesn’t it fall off from its own weight?

    I had to scrape to find the attaching screws because they were so buried in dust. I wear contact lenses and even with protective goggles I was drowning in crap. I was afraid to breathe so I went and got a face mask. The vent for air was so incredibly clogged with layers of dust I doubted that any air was actually pushed through.

    I stopped with the disassembly until the new unit arrived and I could see just how much had to be removed. That evening I took a shower in the same bathroom and evidently the weight added from the humidity of my shower caused thick cakes of dust to fall down on the rug below it.

    Gross.

    If you have a bathroom fan take the cover off the light. Take the bulb out of the light. Find the screw attaching the unit to the ceiling and remove it. Vacuum the ever-loving crap out of the exposed fan and vent and everything you can get a crevasse tool to.

    Your vent will work more efficiently getting the humidity out of your bathroom, the fan will last longer, and you won’t be breathing the disgusting caked dust that results from a failure to do these things every year or so.

  • Packing tips part 2 – All the things the movers won’t take

    Packing tips part 2 – All the things the movers won’t take

    I read all the advice online about long distance moves where they say throw out and give away all the stuff the movers won’t take. Forget that. I had no interest in starting out with a blank refrigerator, no cleaning supplies, no automobile fluids on arrival at my new home. Oh please, who wants to take all your partially used crap? I am totally against waste and throwing things in landfill, so I needed to figure out how to take the stuff with me.

    Packing tips for a long distance move - TheDIYGirl.comPacking the “not allowed items”

    I had a friend with a pickup truck and trailer who was willing to help me move. If that opportunity had not existed I would have rented a truck to move all the things the moving company would not take or I didn’t trust them to take.

    I packed all the fluids, aerosols, matches, whatever that the movers wouldn’t take in plastic containers. I put everything in trash bags inside the containers and sealed them. Good thing since we drove through monsoons getting from Texas to Tennessee.

    So I am now here with all my cleaning supplies, automotive supplies like oil, brake cleaner, etc, and a lot of food.

    Packing food

    The food was the somewhat tricky part. I had two coolers. One for the refrigerator items packed in ice and one for freezer items packed in dry ice. I bought the ice and dry ice Monday night. Packed both coolers on Tuesday before the movers arrived. I drove to Tennessee on Wednesday and Thursday. This was in January — on arrival all the refrigerator items were still very cold and there was lots of ice. The freezer items were so incredibly frozen I had to let the cooler sit open for a little while before I could pry the items out of there.

    I did NOT move meats. I had been careful to consume all meat before moving. But I had a lot of frozen veggies, fruit, dried food for camping, and incredibly expensive homemade basil pesto that I wasn’t about to throw away. It all arrived perfectly. As far as the refrigerator, I didn’t move milk, eggs, or mayo. But all the less perishable things like catsup, mustards, marinades, sauces, salad dressings made it fine.

    It was nice to be able to partially load the refrigerator upon arrival.

    So while the movers have limitations that ensure the safety of your belongings — would you really want a bottle of bleach to leak all over your couch? There’s no reason the stuff can’t come with you if you’re willing to do a little extra work. I’m frugal so this kind of stuff really matters to me.

    What I didn’t trust them to move

    My computer is my life (since I design web sites) so that baby was carefully packed in the back of my SUV and made the trip with me. The movers could take the monitors, the printer — those are easily replaceable — but the hard drives with all the information all went with me.

    I also love my motorcycle, so my BMW F650GS was loaded on the trailer and moved with me.

    Important papers, family photos weren’t leaving my sight and also came in the truck.

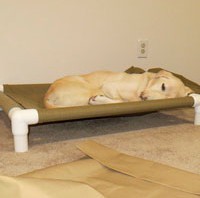
    And most importantly — my dogs. Nikki and Ellie, my yellow labs, rode with me on the way here. They’re a little stressed by all the changes, but I also packed their beds. Those beds have been a constant in their lives and they know all is okay if the beds are there. We got here before the movers and I was sleeping in a sleeping bag. The dogs were in their usual beds. Yes — they’re spoiled and pampered in some ways, but I didn’t want this to be any more traumatic than it had to be.

    The plastic containers of all the things the movers couldn’t take rode on the trailer with the motorcycle.

    I brought a big tool box so I could start working on my new “fixer upper” that was wrapped in a trash bag and sealed with duct tape, I wrapped my huge potted rosemary bush and it survived!

    Prior proper packing…

    FYI — I believe in using a ton of tie-downs to make sure there are no problems in transit. I had everything so strapped down not one thing budged on the 900 mile trip and everything was in good shape on arrival. As I mentioned, all the stuff in the plastic containers was already sealed in trash bags. I used duct tape to secure the lids on the containers and then lots of tie-downs to make sure no lids would blow off or containers move.

    The computer and important papers were in the very back of my SUV and the dogs rode behind the front seats. I used tie downs to make sure the boxes wouldn’t shift and scare the crap out of the dogs while I was driving. I also had a full bag of food to give me a little time to locate their food before it ran out.

    In the end…

    A lot of care on the front end prevents a lot of problems or heartache along the away or on the back-end. Proper packing takes a lot of time and is a total pain, but in the end it’s worth every second. And bear in mind this packing was done in torrential rain. If I can say take the time after that experience, it’s even more worthwhile in decent weather.

  • Packing tips for a long distance move

    Packing tips for a long distance move

    Packing tips for a long distance move - TheDIYGirl.comThe image to the left is what it feels like. Having recently completed an interstate move I have some thoughts on successfully packing. I need to mention that I tend to be anal retentive about organization and that I lucked out and had an absolutely awesome driver who knew how to pack a truck so everything arrived in good condition.

    I have felt a big move coming on for a couple of years so I spent considerable time going through the house I had resided in for 17 years and deciding what needed to go with me and what needed to be moved on to someplace else. I sold things on Ebay, the local Craigslist, I seriously used freecycle.org with great results and lastly donated to Denton County Friends of the Family who were so appreciative of everything I gave them. Oh, and I had a garage sale. It was my first and quite a learning experience.

    So when it came time to pack up I had seriously pared down, not knowing how seriously I would downsize. The move was further complicated by purchasing a fixer upper so the smart thing was to pack in a way that a lot would stay boxed while I worked on the house. Jeez — it got complicated.

    Packing tips for a long distance move - TheDIYGirl.comTip #1: Start asking you newspaper subscribing friends to start saving newsprint for you. Tell them to recycle all the ads and coupons since they aren’t good for packing, but keep newsprint only. I could not believe how much paper I went through to protect my belongings. Yes, you’ll get black newsprint on your hands. Go wash them.

    Tip #2: See if your selected moving company has used boxes at no charge. Boxes for an entire household are several hundred dollars. If you can get them for free it’s a bonus. My mover also kicked in packing tape and 2 bundles on newsprint. Everything you move will have to be in a box so the number of boxes required is astronomical.

    Tip #3: Shop for movers. I got a great quote at a weight that turned out to not be correct. Getting multiple quotes helped me figure out what my stuff really weighed so I could accurately compare the quotes. They’re sneaky and the more information you have the easier it will be for you to figure out the tricks.

    Tip #4: Since I’m an organizational freak I would have liked to close a box when I was done with a particular type of stuff instead of mixing contents. Forget it. Fill every box completely. If necessary use towels, decorative pillows, dust rags, sheets to pad the top of boxes before you close them. Full boxes don’t crush when then have other boxes stacked on top of them. Half full boxes will crush and things will get broken. It will be more confusing when you’re unpacking, but your stuff won’t be broken.

    Tip #5: Utilize wardrobe boxes. Put lamp bases in corners (pack the lampshades in another box). Wrap pictures that will slide down the sides of the wardrobe  box in paper/bubble wrap and then wrap again in cardboard and then slide them down the sides of the wardrobe box. I even slipped a table leaf down the side of one wardrobe box. Use a corner of one box for long things. I slid curtain rods, yardsticks, anything under the 46″ box height. Use wardrobe boxes for garden tools that are under 46″ — I put a trash can in one wardrobe box and then filled it with hedger, weed trimmer, leaf blower, etc. I kept one wardrobe box for moving day and put all the linens from my bed in it. Mattress pad, comforter, pillows, blankets, sheets were all packed in Space Bags first and then put in the box. My bedding and the table leaf filled an entire box.

    Tip #6: Cushion the bottom of dish packs with a generous layer of wadded up paper before packing the dishes with plates on their edge. Add glassware at the top and then fill with more wadded paper. Like I said — I could not believe how much paper I went through.

    Tip #7: I found big pictures to be one of the biggest pains to pack. I generously wrapped each in a lot of layers of paper and then broke down an appropriately sized box and wrapped it around the picture and then taped the ever-loving crap out of it. The mover didn’t provide mirror boxes, but this method worked well.

    Tip #8: Label the boxes CLEARLY as to what room they go to. The movers will love you. Labeled boxes and full boxes and they will know you have more than done your part and will show their appreciation by handling your stuff with care.

    Tip #9: Okay — this one in uber anal. Make a list of your boxes and a general description of what’s in the box. I had a spreadsheet with the box number, the general contents, and where it was to go at the new house. That spreadsheet has saved my butt. I wonder where the hell something is, pull up the spreadsheet, do a “find” for the word, and locate the box number. It was a total and complete pain to do, but all the pain has paid off since my arrival.

    I used Allied Van Lines for my move. I was not impressed with the sales person or customer service person on the Dallas end of the move, but lucked out and got George out of Charlotte, NC who was an artist at packing a truck. It was luck of the draw. I could have just as easily gotten some bozo who didn’t know how to load a truck. On a scale of 1 to 10 I would rate the pre-move people a 2 at best. George was a definite 12. At the end of the day, the person caring for your belongings is the most important element of a move. If there’s any way you can find out about the experience of the driver and the percentage of damage claims, that would be the most important information to have next to pricing.

    There’s no way around how painful moving is. Avoiding the heartache of damage will lessen that pain.

  • Replacing hatch struts on vehicle

    Replacing hatch struts on vehicle

    Symptoms of the problem

    I drive a 2006 Xterra and noticed this past winter the struts that hold the rear hatch door up were wearing out after I whacked my head on it a few times. The weather warmed up and the struts started doing a better job of holding up the door, but on cooler mornings I was slamming my head again so it was time to figure out how to change them.

    Research

    I started looking on the internet for my specific vehicle model and year and found several forum posts on the subject. I was interested in not paying any more than I absolutely had to for the struts and was happy when I found a post on thenewx.org that mentioned ordering parts from McMaster-Carr.

    Replacing hatch struts on vehicle - TheDIYGirl.com“Ordered part # 9416K147 from McMaster-Carr
    Gas Spring with Threaded Ends 175 Force 18.18″ Extended Leanth, 7.87″ Stroke $16.32 each (X2)


    Replacing hatch struts on vehicle - TheDIYGirl.comAlso needed (for my 08) part # 9416K79 
    10mm Ball Socket, M8 Therad, Steel for, Gas Spring with Threaded Ends (Need 2)

    Only tool I needed was a small flat head screwdriver.”


    I love McMaster-Carr which proudly touts that it carries over 490,000 products. I have ordered specialty bolts for my motorcycle from them in the past, so I had no worries about the quality of the parts they carry.

    Verification

    I wasn’t about to order the items without verifying they would work on my Xterra so I removed one strut to measure it and checked the size of the threads.

    There is a metal clip that holds each end of the strut in place. There is a small groove provided for you to insert a screwdriver in order to pop the clip loose. Once it’s away from the end you have to carefully wedge it off the strut. You don’t want to destroy the clips since they will be used again on the new struts.

    Lift Selection

    The guys on the Xterra forums were raving about the slightly longer, stronger lifts and since I was so tired of slamming my head into the hatch I decided to go with that option. It amounted to 175 pounds of lift compared to standard 150 pounds. One guy mentioned his wife and kids had no trouble with the stronger 175 pound lifts. I have one thing to say… he must have big, burly wife and kids.

    The first time I closed the hatch I almost couldn’t do it. Gone were the days of pushing it down with one hand. Now I have to use both hands and try to make sure I don’t have my keys in my hand so I don’t scratch the paint on my hatch. I have to admit I burst out laughing that first time. Well, I wanted stronger lifts. Be careful what you ask for…

    A little longer length is okay. The hatch door opens higher and even tall guys could walk under it. But in my opinion, 150 pounds of lift strength is enough — unless you want an upper body work out each time you close your hatch. Oh well, I’ll live with it.

    Installation

    I love McMaster-Carr — I had the struts in 2 days so time to install:

    1. Open the hatch and prop it up with a ladder and something on top to pad it.
    2. When removing the original lifts make a note of which end goes up and which one goes down. Mine were different.
    3. Unclip the stock lifts by putting a flat head screwdriver under the metal ring that holds them and gently prying it off. Be gentle since you need to use them again. I’d recommend wearing safety glasses since these are strong clips and could pop off and put an eye out.
    4. Unscrew the ends from the original lifts. I had to put the lifts in my vice and use a channel lock to get the ends loose.
    5. Screw the ends onto the new lifts.
    6. Snap the new lifts onto hatch ball tips making sure to install in the correct direction.
    7. Replace the retaining clips. These are strong little buggers and I had a heck of a time getting them back on. It helped that the upper ones could be slid down into place.
    8. Once all four clips are installed remove the ladder and open and close the hatch several times to loosen the new lifts.

    Conclusion

    I tried using a pair of pliers to open those tough little clips a little and had one go flying off, hit the house and sailed off into the groundcover (the car was out on the driveway). I figured that clip was a goner and I would have to go to the dealer to get a new one. Believe it or not, I found it. Let this serve as a warning as to how strong and springy these clips are and protect your eyes and be careful to not lose one while you’re doing the install

    I couldn’t get one of the clips back on and finally asked a friend to do it when he stopped by. They really are tough little buggers.

    All in all, this is basically an easy repair and there’s no need to pay the price for OEM struts from the dealer. If I can do it (with a little assistance), anyone can.

    Note 8/12/2013: As far as going with the stronger struts as recommended on the forums. There was one guy who said his wife and kids could close the hatch with no problem. Well, they must be big burly people because I have to manhandle my hatch down now. No more one handed closing — it takes both hands to pull it down. I’d stick with the normal pressure strut if I had to do it again.

  • Easy way to clean refrigerator coils

    Easy way to clean refrigerator coils

    No how-to pictures for this suggestion.

    On my Whirlpool refrigerator the coils lay pretty much flat and close to the front grill of the refrigerator. They are not easy to get to. With two hyper-shedding dogs in the house, coil cleaning is something I need to do fairly regularly and about all I could reach with the crevasse tool on my vacuum was the very front edge of the coil. I could see all the crud that I couldn’t get to. I needed to figure out an easier and more effective way to clean them.

    Easy way to clean refrigerator coils - TheDIYGirl.comEnter the can of condensed air. That’s what I use to blow the dust and dog hair out of my computer, to get crumbs out of my keyboards — I wondered if it would help with this cleaning project.

    Learn from my mistake — the first time I got behind the fridge, took the back panel off and used almost an entire can spraying the heck out of everything. I was so pleased — everything looked so clean. Then I got out from behind the refrigerator and saw my kitchen floor. I had done a dandy job of solving one problem and creating another. I had a major floor cleanup to take care of.

    The next time I rolled up towels and wrapped them strategically on the floor around the front and sides of the refrigerator before I went to town with the can of air. Much better results this time — the coils were cleaned off and I carefully carried the towels outside and shook them out. Mission accomplished. Next time I plan to damper the towels a bit so they do an even better job of containing the mess.

    One last note — I have found the air pressure seems to vary between manufacturers of these air cans and have at times gotten cans that would barely blow a hair off a table top. Make sure you have a good can for this job. Or maybe you have a hubby with an air compressor who will help out. Gee, that was a sexist comment. Scratch that — maybe you have an air compressor that will help out with this job.

  • Insulated cover for whole house attic fan grate

    Insulated cover for whole house attic fan grate

    The pull chain switch in my whole house attic fan broke and I ended up replacing it on a fairly hot day. While working on it I could not believe the heat coming down through the ceiling grate for the fan. 

    I got online to look for an economical and easy solution.

    What’s a whole house attic fan?

    Insulated cover for whole house attic fan grate - TheDIYGirl.comIn case you’re not familiar, this fan is mounted on the ceiling joists in the attic after a hole has been cut out of the ceiling drywall. An aluminum grate is then installed on the ceiling side. The grate has louvers that open and close. The force of the fan blows them open and then they fall closed once the fan is turned off.

    I absolutely love having a whole house attic fan and would recommend them to anyone whose house layout allows for one. I’m in a three story house and the fan is in the ceiling of the 3rd floor stairwell. I open the windows on all three floors and turn the fan on in the evening to pull the cool air in and blow the warm air up into the attic. It’s incredibly effective at cooling the house down in the spring and fall.

    The down side of a whole house attic fan

    That said, I never use it during the summer since it stays so hot in the Dallas area over night. I had no idea how much heat was coming down from the attic during the hot months of the year. What a waste of energy. I was sure cold came down through it in the winter as well.

    As soon as I realized how much heat was coming in, and since it was summer and I did not want to go up into the attic to do it, I started looking for a friendly solution. Most sites suggested constructing some kind of insulated box to fit over the fan which would require trips into the attic to put it on and take it off. Forget it. I use the fan often during spring and fall and I would not go into the attic to place and remove a cover.

    Then I found Go Green Energy Consulting DIY idea #8:

    We highly recommend that homeowners with whole house fans  cover the grate with a detachable insulated cover when not in use. Lots of heat is able to radiate down from the attic through what is essentially an open hole in the ceiling. Most home improvement stores sell pre-made kits to help you do this yourself, or this is an easy project for a professional.

    Insulated cover for whole house attic fan grate - TheDIYGirl.com

    Finding the materials

    I checked the big box home improvement stores and while they sold the foil covered bubble insulation, it was either in small widths that would have to be pieced or huge rolls that would leave me with a bunch of leftover material. It was the same with most retail places on the internet — either too narrow or too much.

    I checked the web and found Innovative Insulation Inc. in Arlington, TX. I talked to them and asked if they would allow me to purchase just one yard of the insulation that was 48″ wide. I was shocked when they asked for my address and said they’d ship me a piece for free. They sent it FedEx and it arrived the next day. They obviously can’t afford to do this for everyone, but they are one place that will ship small quantities. You will note that my insulation is foil on both sides instead of white on one. I asked for white on one side, but when they shipped the wrong one for free I wasn’t about to complain and just used what they sent.

    Next I went on a search for Velcro and found a 15′ roll of Velcro with adhesive. My concern was that the first time I tried to remove the cover the Velcro would stay together and it would pull off the grate or off the insulation and be worthless. Or it would not detach, but then not be strong enough to hold the insulation in place. My concerns were unfounded. The cover has been yanked off and put up multiple times and the Velcro is rock solid.

    Left over material

    I have an attic hatch instead of stair (another thing that requires a ladder on the third floor) and I had enough of the insulation left over to cover the hatch door in the ceiling. I had to piece it a little bit, but I stapled it on the attic side of the hatch cover to block heat and cold from there as well.

    Results

    I’ve gotten up and checked a few times on really hot days and there is little or no heat coming through the insulated cover.

    My only issue with the cover is as a short person this is going to require a ladder each and every time I put it up or remove it and I’m not thrilled about having to keep a ladder upstairs. I tried reaching from a chair and I can just barely get hold of an edge so maybe I can take it down that way, but maneuvering the pull on/off chain under the cover while I put it up will always require a ladder. After I put it up there were a couple cool fronts during which I could open the windows so the cover had to come down. Then it would heat up again and I’d need to put if back up.

    Despite the inconvenience I still feel the ease of making and using this cover is a great way to insulate from heat and cooling loss when you have a whole house attic fan.

    The bubble insulation is such a cool product I did research on other things it could be used for.

  • Replacing pull chain for whole house attic fan

    Replacing pull chain for whole house attic fan

    One evening I pulled the chain on my whole house attic fan to turn it off and thought at the time it sounded a little funny. The next morning I went to turn the fan back on and found out why — the switch for the pull chain had broken. I am not a big fan of getting up in my attic since I live alone, so I got a ladder and checked to see if the switch was accessible from the house instead of the attic. It was. I had to reach through the grate and it required some dismantling, but I got the switch out and headed for the computer to find one here in town. I love my attic fan so much and wanted it working again immediately. I called everywhere; hardware stores, lighting stores, electrical supply stores, Radio Shack. I went to the big box home improvement stores hoping they would carry it despite the fact it wasn’t listed on their web sites. No one carried the switch I needed locally. I gave up and couldn’t believe the best price I could find on ordering it was once again on Amazon for $7.99 and no shipping. The switch came with wiring instructions and was easy to put in. I reassembled the box it was housed in and everything worked perfectly. The switch came with a pull string so I added the chain from the old switch and it was good to go. Whole house fans start at $200 so I was thrilled mine could be easily repaired for $8.

  • PVC cots for dogs

    PVC cots for dogs

    Nikki and Ellie aren’t the first Labrador Retrievers I’ve had so I am aware of the ongoing genetic issue of hip dysplasia in their breed. I wanted my girls up off the floor with their hips cushioned.

    Both were crate trained for the first 2 years of their life — meaning if I wasn’t home they were in the crate. I loved it because I missed the whole having my home chewed phase. When they hit 2 years old the crate was removed and a cot put in its place. Since they are 2 years apart in age, that means I moved Nikki to a cot when I got Ellie because she needed to be in the crate. I couldn’t face training more than one dog at a time so I spaced them out.

    When I brought Ellie home I started building the frame and sewing the slings for Nikki’s dog cot. I bought enough materials for 4 cots — 2 downstairs where they stay when I’m gone and 2 in the bedroom for sleeping at night.  The whole time I was making the cot I was thinking I’d do all that work and they wouldn’t so much as look at it. Wrong.

    I put the first cot down in the kitchen when I was spending a lot of time remodeling it and they both climbed in. Ellie was really little at this point so they cuddled up together to nap.

    PVC cots for dogs - The DIY Girl
    1st day on new cot — they needed to include their “puppy” toy


    PVC cots for dogs - The DIY Girl
    PVC reasy to assemble
    PVC cots for dogs - The DIY Girl
    Detail of corner fittings with non-slip pads for ceramic
    PVC cots for dogs - The DIY Girl
    First sling mounted on PVC
    PVC cots for dogs - The DIY Girl
    Both slings assembled
    PVC cots for dogs - The DIY Girl
    1st corner assembled
    PVC cots for dogs - The DIY Girl
    Completely assembled cot
    PVC cots for dogs - The DIY Girl
    Level view of cot
    PVC cots for dogs - The DIY Girl
    Nikki and Ellie on current Cordura cots

    Nikki and Ellie are now 9 and 7 years old and they still love their cots.

    If you’re interested in making your own cots I can send you the dimensions I used for these. If you’d rather just put one together, email me and I can make it and ship it to you.

  • Sprite Industries Shower Filter – Product Recommendation

    Sprite Industries Shower Filter – Product Recommendation

    I’ve had one of these for a while and I think they’re great. Who wants to douse their hair and body with chlorine every time they shower? It’s very drying for your skin and your hair.

    The filter assembly is pictured left and the replacement cartridges are on the right. The assembly comes in white, chrome, or gold and the filter inside is supposed to last a year — you reverse it after 6 months. You simply install it before your current shower head. I suggest you use Teflon tape on the threads. After 6 months you screw it open and reverse the filter and 6 months later you put a new filter in. They provide a little plastic cling sticker so you can mark down the date to change it and put it in the shower.

    The only problem might be for really tall people since it lowers the shower head. Not a problem for me at 5′ 3″.

    Supposed to remove chlorine, rust, sediment, hydrogen sulfide and heavy metals with the HOC cartridge.

    Sprite Industries Shower Filter - Product Recommendation - TheDIYGirl.comAll I can tell you is that my hair and skin are softer when using it and I know (if I’ve ignored the sticker) when the filter needs to be replaced because I start getting dried out again. The filter may not last as long if multiple people use the shower every day, but it’s worth every penny.

  • Removing soap scum – great article!

    Removing soap scum – great article!

    As part of my shower repair project I wanted to do a really good cleaning to remove soap scum and hard water accumulation. A job I absolutely dread — partly because it’s such hard work and because I’m never sure what’s the least painful product to use. I’m always worried I’ve missed some great product that would make it really easy.

    Enter the Manly Housekeeper. He explains why soap scum and hard water become such a problem and then tests 6 well known products to see which works best. He taped off 6 sections of a glass shower wall and took pictures of how each one worked. Check out the whole article at:

    http://www.themanlyhousekeeper.com/2011/03/11/solved-soap-scum-and-hard-water-stains/

    Needless to say I promptly went out and got Barkeeper’s Friend to clean my showers. Thank you to the Manly Housekeeper for the work and great information! I’ll be checking out more of your articles.