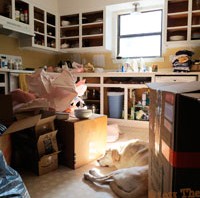
Unpacking finally.. and partially.

I decided since the cabinet frames were painted and I was hitting a brick wall on finding 1/4″ MDF at a lumber yard that would cut it into 3″ strips so I could update the cabinet doors that I should go ahead and unpack some boxes so I could cook more.
 Unpacking the boxes would also make it easier for me to get to the walls to remove the remaining chair rail, repair the drywall, and paint the walls. You can see the chair rail running along the wall behind the microwave.
Besides, it was a blessed relief to have a full set of dishes, silverware, food prep, and backing dishes. Amazing how much you miss the stuff when you don’t have it.
After everything was put away it was time to get the chair rail off and repair the drywall where it had been. This was going to be especially important since I was using a satin paint that would show all the flaws in the drywall. I was planning on getting Clark + Kensington from Ace Hardware again.
Repairs

 I filled all the holes and spread a thin coat of mud to eliminate any sign of where the chair rail had been. I then sanded it with a drywall sanding screen, filled a few problem areas, allowed that to dry, and sanded again. The kitchen walls were easy (other than the sanding dust).
I had an electrician out to add outlets along the backsplash, wire an outlet for a light over the sink and run a switch for it. I hung the new sink light.
I’d removed the board that had hidden a cheap flourescent light over the sink that had a cord going to one of the backsplash outlets. Not only was this ugly, but violated code.

I had already sprayed the soffits with water and then scraped off the popcorn texture so I could paint them the same color as the walls. Removing popcorn is a messy job. Who puts popcorn on soffits???
The last thing I did was caulk along the baseboards all around the room. I taped off the cabinets and the baseboards after the caulk had dried and I was ready to paint. Woohoo!


