While painting I realized this would be the time to do something about the gaps between the tops of the wall cabinets and the soffit above them. I wanted molding, but it needed to be fairly narrow so it wouldn’t interfere with the cabinet doors.
I went to the store shopping for wood molding but couldn’t find the simple cove look I wanted in primed pine and unwillingly stumbled onto what may be one of my new favorite things — polystyrene molding. As I drove home with the molding I figured I had made a mistake. It probably would disintegrate when I cut it and clearly look like plastic when installed. I almost turned around to get something else.
Working with the molding
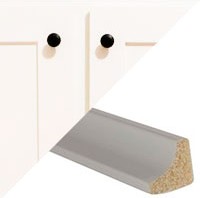
 I had purchased 11/16-in x 11/16-in x 8-ft White Polystyrene Cove Moulding at Lowe’s.
Since it was only $3.19 per eight foot section I tried a preliminary cut on my miter saw to see if it would even work. I was pleased with the result.
The the fascia boards along the sink aren’t flush with the side walls of the cabinets and extend out about 1/8th of an inch. The polystyrene was very easy to cut with a skill knife to notch out so the trim would fit flush. At this point I was thinking maybe the polystyrene wasn’t so bad.
I did a little checking online and it was recommended to use caulk to basically glue it in place.
Installing
The molding is so light in weight that it was easy for me, working alone, to place the caulked strips in place and press them until the caulking held. The corners mitered easily As you can see in the picture below.
By the time I was about half done I was in love with the stuff. It was so easy to work with, it cut great, It looked great on the wall. It’s the perfect trim to finish off the cabinets and it cost under $10.
I wasn’t able to completely finish because I ran out of caulk. The trim is installed, but I need to run a bead of caulk about and below the trim to blend it into the wall over the stove and refrigerator.
I can’t believe how great it looks. The next coat of paint on the cabinets will make it look like it’s always been a part of them.
I’m already thinking of more projects for foam molding — like the cornice I would like to make for the living room window.


If you’d like to see a really great how-to video on working with foam molding check out this video by Ron Hazelton:


Comments
2 responses to “Shaker Kitchen Cabinet Update – adding trim”
Great job, something to be proud of. I have just about everything to do mine now, I just need to work up the courage.
It’s a big job so I understand the trepidation. Just think of every time you walk in the kitchen absolutely loving the way your cabinets look. And better still, you did it for a few hundred dollars instead of the thousands. That makes it even better. Let me know if you have any questions along the way.