Category: Home Projects

Home Projects to Repair or Improve

  • Quality paint brushes vs. foam paint brushes

    Quality paint brushes vs. foam paint brushes

    I recently read a post by another blogger who stated she only uses disposable rollers and foam brushes. She admitted it wasn’t “green”, but it was easy.

    While I agree (and love) the ease, there are overriding issues with these two brush types.

    Why I hate bristle brushes

    When I was a little girl my skills were not deemed good enough to paint, but they were deemed good enough for clean up. So while the big people painted, the pans, rollers, and brushes were handed to me to clean. And the big people were picky. Needless to say I got really good at cleaning.

    The funny thing is how the nasty tasks you’re stuck with as a child become the tasks you absolutely abhor as an adult. I can get through the biggest painting project without batting an eye, but I totally blanch at the clean up that inevitably follows. If I felt okay with it, throwing it all away would be absolute bliss for me. Unfortunately I still have those brushes of incredible quality that my dad used to paint with so I am forced to care for them.

    Forced isn’t really an accurate term — I lovingly care for those brushes because in doing so I remember the man who used them and taught me how to use them with skill. Still hate the whole brush cleaning process. Sorry daddy.

    Why I love (quality) bristle brushes

    There’s more to foam brushes vs. brushes you clean and keep than “easy” or “green”  — there’s quality of application.

    I’m not buying that anyone can cut in along the ceiling with a foam brush. I also don’t believe anyone can get paint up into tight corners with a foam brush. Top this off with the fact that they quickly break down and don’t last long enough to complete a big project.

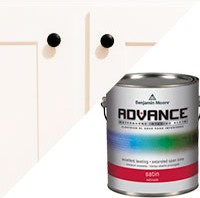
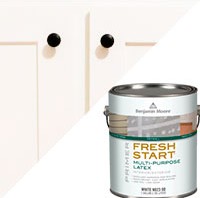
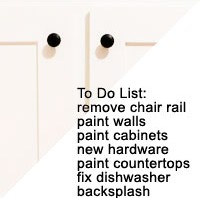
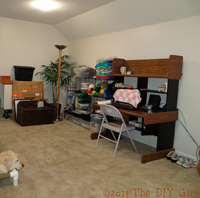
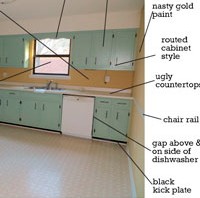
    Case in point: I’ve been painting kitchen cabinets for the first time in my life. I bought high quality mohair rollers (which I would want to clean) and tried to get by with foam brushes for all the corners, etc.

    There were several problems with the foam brush. It didn’t apply a nice coat of paint to the cabinets where I used it. When I was working on the bottom of the cabinets (the most dreaded part of this operation) I could not, for the life of me, force paint up into the corners. Wouldn’t you think foam would do a better job than bristle? Wrong. No matter how much I tried, I couldn’t get paint up there.

    On the second coat of paint for the cabinets I switched to a quality bristly brush. Where I had been totally unable to fill paint into the corners, it flowed in with no problem. Where the foam brush provided smeared coverage of boards that couldn’t be rolled, the brush flowed paint on with smooth coverage.

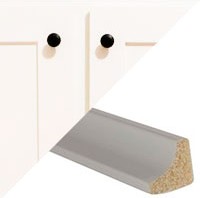
    One the baseboards (where I was trying to cover black with snow white) the brush flowed paint on with thorough coverage.

    It was a thing of beauty.

    Final analysis

    While I absolutely detest cleaning brushes after a paint job, I have such good results when cutting in around ceilings, windows, doors, and baseboards, filling paint into corners that I will suffer the pain of cleaning brushes for the outstanding application.

    Where do I think foam brushes are perfect? I always keep a stash of touch up paint (in old peanut butter jars that have rubber seals) and a good quantity of foam brushes for touching up spots on the walls to keep them looking perfect. That way me and the dogs don’t have to be perfect. Accidentally slam a chair into the wall? Throw a dog toy that marks the wall? No worries — take a few minutes every once in a while to touch up the marks.

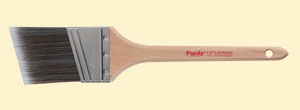
    Big project? Use a high quality brush that’s appropriate for the type of paint you’re going to use. Personally, I love Purdy brushes, but I suspect Wooster and others are also good.

    And be patient with yourself. Learning to cut in is a skill that includes knowing what side of the brush to load the paint on, how much paint to load, and how to angle the brush. It takes practice, but once learned provides beautiful results. And painting can become fun. I’m not sure the clean up can ever be fun…


  • Shaker Kitchen Cabinet Update – painting boxes

    Shaker Kitchen Cabinet Update – painting boxes

    I have been very frustrated that other blogs have introduced the idea of a Shaker kitchen cabinet update and then provided next to NO details on how to do it. No mention of what wood, what thickness, what width strips, how they cut it, what type of adhesive they used. Nothing. Very frustrating.

    So for better or worse, I’m going to provide excrutiating detail of what I do with this Shaker kitchen cabinet update. I will tell you what I do and whether it works or not.

    The paint

    Since I want the paint to bind really well to the cabinets my plan is to err way on the side of caution with drying time.

    Shaker Kitchen Cabinet Update - painting boxes - TheDIYGirl.comI put the primer on yesterday, so I allowed the cabinets to dry overnight before painting.

    After reading the post at Young House Love on cabinet painting I purchased Benjamin Moore’s Fresh Start Primer and Benjamin Moore’s Advance Waterborne Interior Alkyd Paint – Satin Finish. The primer went on yesterday and I applied the first coat of paint today. For both primer and paint I’m working with a mohair blend roller for the smoothest finish possible.

    Shaker Kitchen Cabinet Update - painting boxes - TheDIYGirl.comI followed the same routine I used for the primer written up in a previous post. The primer had allowed a lot of the green paint on the cabinets to show through, but this first coat of paint finally covered it up. I was not sorry to say goodbye to the green paint.

    I am hoping I can get by with 2 coats of paint over the primer, but will do a 3rd coat if it’s needed to cover well. I will allow a lot of drying time between coats (more than specified on the can) to make sure I get good adhesion.

    First coat

    Here’s how the cabinets are looking after a coat of primer and one coat of paint. The can says 16 hours drying time — I gave it 24 hours.

    Shaker Kitchen Cabinet Update - painting boxes - TheDIYGirl.com
    First coat of paint

    Second Coat

    I took a day off to let my hands recover. Between the split skin on my thumbs from all the drywall work and the oops cut I added today when carving the polystyrene I think my hands need a day off to recover. It would give the paint more time to dry.

    Shaker Kitchen Cabinet Update - painting boxes - TheDIYGirl.com
    Second coat of paint


    The second coat looks great. Note how nice the trim I added at the top of the cabinets looks with a coat of paint on it 🙂 It all looked good enough that I pushed the stove and refrigerator back even though I feel I need to put another coat on the bottoms of the upper cabinets. I’ve been laying on the counters to do that so the appliances won’t make a difference.

    So far I’m happy with what I chose to paint. I think painting the front edges of the shelves in the upper cabinets is going to give them a great appearance when the doors are open.

    I do think I will roll a third coat of paint on the fronts of all the cabinets because I’m applying such thin coats.

    Now if I can find someone to help me cut the wood I need to make-over the door and drawer fronts. So far I’m not having any luck. I’ve started wondering if I should just them white as is and see how that looks.

  • Shaker Kitchen Cabinet Update – adding trim

    Shaker Kitchen Cabinet Update – adding trim

    While painting I realized this would be the time to do something about the gaps between the tops of the wall cabinets and the soffit above them. I wanted molding, but it needed to be fairly narrow so it wouldn’t interfere with the cabinet doors.

    I went to the store shopping for wood molding but couldn’t find the simple cove look I wanted in primed pine and unwillingly stumbled onto what may be one of my new favorite things — polystyrene molding.  As I drove home with the molding I figured I had made a mistake. It probably would disintegrate when I cut it and clearly look like plastic when installed. I almost turned around to get something else.

    Working with the molding

    Shaker Kitchen Cabinet Update - adding trimI had purchased 11/16-in x 11/16-in x 8-ft White Polystyrene Cove Moulding at Lowe’s.

    Since it was only $3.19 per eight foot section I tried a preliminary cut on my miter saw to see if it would even work. I was pleased with the result.

    The the fascia boards along the sink aren’t flush with the side walls of the cabinets and extend out about 1/8th of an inch. The polystyrene was very easy to cut with a skill knife to notch out so the trim would fit flush. At this point I was thinking maybe the polystyrene wasn’t so bad.

    I did a little checking online and it was recommended to use caulk to basically glue it in place.

    Installing

    The molding is so light in weight that it was easy for me, working alone, to place the caulked strips in place and press them until the caulking held. The corners mitered easily As you can see in the picture below.

    By the time I was about half done I was in love with the stuff. It was so easy to work with, it cut great, It looked great on the wall. It’s the perfect trim to finish off the cabinets and it cost under $10.

    I wasn’t able to completely finish because I ran out of caulk. The trim is installed, but I need to run a bead of caulk about and below the trim to blend it into the wall over the stove and refrigerator.

    I can’t believe how great it looks. The next coat of paint on the cabinets will make it look like it’s always been a part of them.

    I’m already thinking of more projects for foam molding — like the cornice I would like to make for the living room window.

    Shaker Kitchen Cabinet Update - adding trim
    Area I had to carve to fit flush to cabinets

    Shaker Kitchen Cabinet Update - adding trim

     If you’d like to see a really great how-to video on working with foam molding check out this video by Ron Hazelton:

    How to Install Polystyrene Crown Molding

  • Shaker Kitchen Cabinet Update – painting prep

    Shaker Kitchen Cabinet Update – painting prep

    Shaker Kitchen Cabinet Update - painting prep - TheDIYGirl.com
    Deciding how much to paint

    I believe the first thing you need to do when contemplating painting cabinets is to take a real long look and decide how much. Just the face of the cabinet frames and the outside of the doors? Paint everything including the insides.

    Personally, even if you held a really big gun (and I mean something like a bazooka) you could not make me paint the inside of cabinets and fortunately I have cabinets with decent interiors.

    How much do you want to paint?

    So how much did I want to paint. The current green is only on the outside of the doors and I had already decided I wanted to paint both sides of the doors. Next the cabinet frames. I want them to really feel like white cabinets when I  open the doors (hence painting the inside of the doors) so I scrutinized where I wanted to draw the line on white. I wanted to let difficulty dictate it — not going to go there if it was too hard to do.

    The shelves on the base cabinets were recessed so I wasn’t worried about them. The design of the base cabinets made it easy to paint the inside of the door opening. I felt the upper cabinets needed the same treatment — paint the inside of the door opening. Paint the front of the shelves? The are covered with trims that cups the front edge of the shelves so I decided to paint the top, front, and bottom of this trim.

    You have to make these decisions first so you know what to prep. The more you paint the more you prep — unless you’re painting everything.

    I covered the table and all the boxes of my packed kitchen with plastic and taped plastic over the doorway to to living room to try to contain the sanding dust.

    Shaker Kitchen Cabinet Update - painting prep - TheDIYGirl.com
    Hardware removed and everything washed

    It’s important that all grease, oils, and dirt be removed so that nothing interferes with the paint adhering, so after I had removed the doors and drawers and taken off all the hardware I used a strong solution of Dawn dish washing soap (known for it’s grease cutting) and a scrubbie pad and scrubbed the living daylights out of every surface I was going to paint.

    After washing I went back and thoroughly rinsed everything to make sure there was no soap residue left on the surfaces. Again — maybe this was overkill since I was going to be sanding, but after seeing the sides of the stove I chose to err on the side of caution. Nothing would be worse than painting all the cabinets and several months down the road have the paint start peeling.

    Shaker Kitchen Cabinet Update - painting prep - TheDIYGirl.com
    cabinets sanded

    I used my palm sander with 60 grit sandpaper and went over all the surfaces I planned to paint. I followed up with 220 grit paper to smooth the surface.

    It may have been overkill but after cleaning up all the sanding dust, I followed this with wiping all the surfaces with deglosser. I know there are VOC versions of this stuff and I would recommend getting it. I had the non-VOC version and the fumes were horrible. The rag I used went outside as soon as I finished.

    Last thing to do was to tape off the bottom shelved of the wall cabinets to delineate the inside of the opening from the floor of the cabinet.

    Shaker Kitchen Cabinet Update - painting prep - TheDIYGirl.com
    taped edge

    FYI – I dreaded pulling out the stove. I wasn’t sure how it would slide over the floor and expected the floor underneath it to be gross. The floor wasn’t gross. The sides of the stove were disgusting. Lots and lots of cooking grease has run down the sides and never been cleaned. Note to self — if you live somewhere with a stove, pull the things out once a year and clean the sides. I’ve lived with a built-in oven and cooktop previous to this, so never had to deal with it.

    Shaker Kitchen Cabinet Update - painting prep - TheDIYGirl.com
    Note the grease running down the sides

    Ready for Primer

    After a lot of sanding, washing, and deglossing I felt the cabinet frames were ready for primer. Painting cabinets is such a big job I wanted to make sure the paint stuck really well.I didn’t mention, but I also sanded and deglossed the black toe kick board under the cabinets so I could get it painted white to match the cabinets.

    Putting on the primer

    Painting the frames is covering a lot of narrow areas. I opted to use a wool small roller to get the smoothest finish possible. You have to use a really light touch with the roller to avoid runs. I used a brush to get the corner of the openings, along the wall, and the sides of the shelf trim close to the door openings. Then I rolled the inside of the door openings and the shelf trim top, bottom, and front, and finally the front of the wall cabinets. Since I had pulled the stove out it was easy to reach the inside of the cabinets facing the stove.

    Shaker Kitchen Cabinet Update - painting prep - TheDIYGirl.com
    Cabinets with primer coat

    The last thing I did on the wall cabinets was paint the bottoms. They consisted of a lot of cutting in with a brush and then rolling the bottom wood.

    I moved on to the base cabinets, using a brush again to do the inside corners of the openings, rolled the inside of the door openings, rolled the fronts and then the toe kick area. Yikes. Painting cabinets is tedious, tedious, tedious…

    A note about primer. Some people think you have to completely blot out the surface below the primer. The primer I was using was meant to be a binding layer between the old paint and the new paint — not completely cover the old paint. I confirmed this with the folks at Benjamin Moore. So while I did make sure I had an even layer of primer on all surfaces, you could still see the green through it. Benjamin Moore told me a second coat of primer is not necessary.

    The worst part of painting cabinets

    Without question the worst part of the process is the under side of the wall cabinets. I ended up clearing off the counters and laying on my back so I could see what I was doing and it was still a pain. There is so much that has to be painted with a brush because of the insets. I don’t feel like it looks all that great, but I don’t figure too many people are going to perusing the bottom of my cabinets so as long as they’re white, I’m not going to worry about it.

    Shaker Kitchen Cabinet Update - painting prep - TheDIYGirl.comShaker Kitchen Cabinet Update - painting prep - TheDIYGirl.com


    Note the additional electrical outlets on the backsplash on either side of the sink and the old-fashioned board is gone over the sink 🙂

    Need I mention how hard it is to use a kitchen while you’re doing this kind of project. If it wasn’t for the stove surface, I’m not sure what I would have done…

    This shows how much I painted on the frames

    Shaker Kitchen Cabinet Update - painting prep - TheDIYGirl.com


  • Light, outlets, and bathroom fan

    Light, outlets, and bathroom fan

    place-for-light
    No light over sink

    I had gotten a quote from an electrician for installing the bathroom fan/heater/light, adding a wired box with switch for a light over the kitchen sink, and adding a couple of outlets on the back splash that only had 2 outlets.

    He had quoted $200 which I thought was really reasonable.

    Two guys were here for 4 hours. The light and outlets in the kitchen went in easily. They pulled the wall cabinet off the wall on the right side of the sink so they could hide the holes they would have to make to get the wire into the soffit over the sink.

    Fan hole and new fan

    The bathroom light was a different story and I ended up being so glad I had bailed on trying to do it myself. They had a heck of a time getting the old housing out and installing the new housing. Since there were separate switches for the fan, the light, and the heater, I was glad it was them figuring that mess of wires out instead of me. It took them a while but I now have a functioning unit. I bought it at Amazon since that was the best price I could find.

    An add-on

    While they were up in the attic I asked them to remove the bracket for the living room ceiling light that was blocking my attempts to put in a fan support bar and add a ceiling fan to the living room.

    The very best part

    The most important part was I had a successful experience with getting a quote, getting the work down, and not getting jacked around as far as the bill. The electrician said he had to figure out the bill comparing what was quoted versus what they had done. I gulped. I figured the bill was going to go way up. I had added things. They were here for 4 hours. Oh no.

    He came in and said he thought $200 was correct. Two guys working 4 hours with an added request. I almost jumped up and down.

    Next

    I didn’t feel I could move forward with the kitchen until I had the light and outlets taken care of. Now I can get going on painting the cabinets!

  • Shaker Kitchen Cabinet Update Plans

    Shaker Kitchen Cabinet Update Plans

    Here’s the to do list for the kitchen update:

    Issue Plan
    1. Popcorn ceilings Back Burner
    2. Popcorn on soffits Removed and primed
    3. Gold walls Change to buttery yellow
    4. Green paint on cabinets and cabinet hardware Change look, paint, new hardware
    5. 80’s light fixtures. update
    6. Counter tops update
    7. Black toe kick prime and paint with cabinets
    8. Spindle railing live with for now
    9. Vinyl flooring live with for now
    10. Electrical issues – more outlets on back splash and hard wire light over sink with a switch get electrician to take care of

    I’m not going to worry about the ceilings unless I decide to stay here permanently and I seriously doubt that will happen. If I’m going to put this up for sale I want to spend as little as possible while maximizing the resale amount so that means doing a lot of work myself and not buying new cabinets.

    I have already scraped the popcorn off the soffit and primed them for painting. When I pulled the board that connected the cabinets on each side of the sink I realized the popcorn on the bottom of the soffit wasn’t going to work so that has been scraped off and primed as well.

    I have to resolve the light over the kitchen since the current light was attached to the board across the front that’s been eliminated. Not into the scrolled woodwork and it opened up the window so it looks a lot bigger.

    An electrician came out a couple of days ago to quote installing the bathroom fan/heater/light, hard wiring a light fixture over the kitchen sink, and adding two outlets to the kitchen back splash area. He emailed a quote the next day of $200 for all that. I’m totally on board with that and asked to get it scheduled.

    The same man also happens to do cabinets and countertops on the side so I talked to him about my ideas to improve the appearance of my cabinets. I showed him the pictures I had gotten from The Lettered Cottage. The “before” cabinets are almost identical to mine and I would love to achieve their “after”.

    Shaker Kitchen Cabinet Update Plans - TheDIYGirl.com
    From The Lettered Cottage
    Shaker Kitchen Cabinet Update Plans - TheDIYGirl.com
    From The Lettered Cottage

    These are the only picture they posted of how the change in cabinet appearance was done. I emailed asking for details on thickness of the wood and how it was attached but never received a response.

    Shaker Kitchen Cabinet Update Plans - TheDIYGirl.com
    From The Lettered Cottage

    I don’t want the middle piece, but I want the Shaker like frame. He had all sorts of ideas and seemed to have no problem helping me update my kitchen in a low-cost way. He thought he could have all the wood for the doors and drawers ready for around $200. What a deal.

    The cabinet-maker suggested cutting off the lip of the door and then adding another life with the window frame and then adding invisible hinges. I’m not sure about making the inset of the doors a full 3/4″ instead of its current 3/8″ and was somewhat aghast at the cost of invisible hinges. I found $11 a pair to be a common price and with 20 doors that $220 for hinges alone compared to just updating to black hinges for around $40.

    He checked out the cabinets and said they were custom and well-built so they were definitely worth updating and painting.

    I’m hoping this will work out, but also realize people are kind of flaky so I’m not totally confident it will happen. If I don’t hear from the guy I will check other options.

    Note: Despite emails and calls the guy went MIA so I had to come up with a different plan.

  • Painting master bath

    Painting master bath

    I was painting a lot of light colors in other rooms to maximize the light, but wanted the master bath to be a really dark, almost evergreen, green with the snow-white trim and shower.

    I once again tried the Clark + Kensington in Carriage Hill green after doing some drywall repairs and priming those spots.

    I don’t want to minimize painting. You have to remove all the electrical plates, the towel bars, toilet tissue holders, the bathroom mirrors. You have to tape all the woodwork and counters. Groan — you have to paint around the toilet.  Painting a large room is easier than the small confines of the normal bathroom, But the results are worth it.

    bath-before
    Before Picture
    bath-primed
    I painted a test area on the right to see the color

     The Clark + Kensington paint went on nicely, but I did need to touch up with a light second coat since the gold showed through in spots. No big deal — it only took a few minutes.

    The finishing touches included finding a shower curtain that would go with the paint and towels and also a towel rack that would hold the towels near the shower so I could reach them. I decided on a three arm rack that would also hold an additional hand towel/wash cloth set. I’m happy with the results — especially when comparing to the first pic in this post!

    bath-finished
    After picture


  • Painting Basement Den Area

    Painting Basement Den Area

    The first room I painted in my newly purchased house was the living room. Since I’d had great luck at my previous house a few years ago with Valspar paint from Lowe’s that’s what I purchased for these rooms. valspar satin

    As I stated in another post it simply wasn’t the same paint. Roller marks were a terrible problem and if I tried to go back and smooth them out the paint lifted off the wall. I realized it could be a result of poor quality paint I was trying to cover.

    After checking Consumer Reports I wanted to try their top rated Clark + Kensington paint from Ace Hardware. 192508-interiorpaints-clarkkensington-satinenamelace

    I chose a bone white satin to brighten the basement room and the Clark + Kensington paint went on beautifully with no roller marks. I had a little problem with the paint trying to lift off, but decided it was because of the poor quality paint I was covering since it didn’t happen when I painted the primed areas. Maybe I should have primed all the crappy paint.

    The odor was negligible, it dried quickly even in a basement area, and everything cleaned up easily.

    teflon pan

    I was less than impressed with the Teflon coated roller pan I decided to try. Maybe the paint would have washed out easily when it was wet, but the sales person at Ace told me you allow the paint dry overnight and then just pull out the skin of dried paint the next morning. Not happening. I could scratch the paint off the next day. I allowed it to dry an additional day with no change. The primer was never going to simply peel out of the pan. I will attempt to return it. It does say “latex” paint peels out, so maybe the primer was the problem. I still wasn’t impressed.

    paint-rollerThe Teflon roller I used with the bone white paint cleaned up fairly easily. I used the cleaning tool and wasn’t that impressed with the results, but then how else would I get the paint and water out of a roller?

    What I really did like was a rigid plastic roller pan I bought at the Benjamin Moore shop for $1.49. It was strong enough you didn’t need a metal roller pan and for $1.49 I didn’t mind throwing it out. For heaven’s sake — a line at Lowe’s is $1.99. The rigid liner was much better. I will try to find out the brand and will post the information later.

    paint-tray

    The primer from Lowe’s seemed to work okay, but I don’t have a whole lot to compare it to. I will use it again in the kitchen on the soffit where I remove the popcorn and on the backsplash before I wallpaper and will post how it works in those areas.

    The results

    I tore off paneling, I replaced a section of drywall, did a lot of drywall repairs that I then primed before painting.  The paint went on great and the bone white is SO much better than the previous gold. I also replaced the light fixtures with $7 dollar ceiling fixtures from Ikea. Whoa — what an improvement.

    den before -- with same awful gold paint that was in every room of the house
    den before — with same awful gold paint that was in every room of the house


    paneling removed
    paneling removed
    New section of drywall on left
    New section of drywall on left
    Drywall repaired and primed
    Drywall repaired and primed
    Den painted bone white with  new ceiling fixtures
    Den painted bone white with new ceiling fixtures

    Final Note

    I was getting close to the end of painting and realized I wasn’t going to make it with one gallon. I call the Ace Hardware in La Follette and asked if they would mix another gallon and have it ready so I could run in and grab it and get home without having to wash my roller pan and roller. No problem.

    I covered the roller pan and roller with a wet towel and drove up to the store. My gallon of paint was mixed and waiting for me. Jennifer even had it waiting for me at the door. I paid and was back home and painting in 20 minutes.

    Now tell me Lowe’s would do that… I don’t think so. Not only do you get great paint at Ace, but you get awesome service as well.


  • My “new” kitchen

    My “new” kitchen

    My new fixer upper in Tennessee has decent bathrooms, but I feel the kitchen is abysmal. Sheesh. Oh, let me count the things I don’t like about it…

    Let’s start at the top

    Kitchen Problems - The DIY Girl

    Allow me to preface this with my apology if you happen to love any of the things I’m going to mention. I don’t mean to offend, but there are some things I really, really detest.

    1. Popcorn ceilings. Who invented that idea and can we find him/her and shoot them? Of course the popcorn problem is in every room of the house.

    2. But I have never heard of anyone putting popcorn on the soffit over cabinets. I’m not going to tackle popcorn removal on the ceiling, but it’s coming off the soffit so I can paint it the same as the walls.

    3. The gold walls, but like the popcorn that exists in every single room of the house. The same hideous paint that wipes off with a cloth and absorbs everything that comes in contact with it. Note to self — don’t ever think cheap paint is a bargain. As stated with the living room and hall, I’m not a chair rail kinda girl and that needs to go too.

    4. The green paint on the cabinets. Not only is it a yucky green, it was poorly applied, and is even more hideous when juxtaposed with the gold wall. It’s gotta go. The style of the cabinets is clearly 30 years old and so is the cabinet hardware.

    5. Digressing a little upward — the 80’s light fixtures. Another thing that’s gotta go.

    kitchen-before-1

    kitchen-before-2

    6. The counter tops — they are a pale leafy pattern . They aren’t in terrible shape, but Formica is Formica. When I paint the cabinets white the counters are going to need some color. I have no idea what I’m going to go with but I know I want more color.

    7. The black toe kick. I understand the practicality of that choice and it probably didn’t look bad when the cabinets were really dark wood, but it doesn’t work with green and it’s not going to work with white. I rather have to touch it up every once in a while that leave it black…

    Okay – now facing the other direction… After rearranging the shelves that were set up to accommodate nothing by soup cans I think I can live with the pantry. I fixed the light at the top of it, so it even has light at night. Most importantly it has room for the dog food container and dog biscuit container on the floor. We have our priorities, after all 🙂

    kitchen-before-3

    8. I could really live without the spindle railing in the kitchen and would love to have a real wall there instead. It’s not very strong — I started to trip at the top of the stairs and grabbed the rail — it’s very flimsy at that end. I realize a wall might have the same issues, but I’d like the solidity of a wall painted the same color as the rest of the kitchen.

    9. Vinyl flooring. Now that I’ve cleaned it up I realize it’s not in bad shape. If I stay I will want to change it, but if I decide to turn around and sell the house it will stay.

    10. Electrical issues – the cheap flourescent light over the sink isn’t hard wired — a cord goes to one of the TWO outlets in the backsplash. Two outlets? What kitchen has only 2 outlets in the backsplash?

    I bought a microwave cart from Ikea before leaving Dallas and may go to the Ikea in Charlotte and get an island. There is ample room in the kitchen and I think the added work surface would be awesome.

    But first I have to resolve all the above mentioned issues…

  • Another example of why I’m the DIY girl

    Upbringing

    I was raised by a dad who wouldn’t allow the use of the phrase “I can’t.” On the rare occasion I would dare utter those two words he would sigh and calmly respond “You can do anything you want to do. What you’re saying is you’ve decided you don’t want to.”

    This was a constant and repeated theme until the phrase “I can’t” was extinguished from my vocabulary. What a gift. I wish it was a gift every parent gave every child.

    Experience

    do more suck lessWhen I have allowed people onto my property to work on things the experience has not been good. They work on what I’ve requested, destroy everything in their path, and don’t do all that great of a job at what they were hired to do.

    It’s just proven to not be worth it. So I take my time, research on the internet to learn how to do things, and do it myself. No destruction of surrounding things and the job gets done to my standards.

    I have one shining exception to this. Maintenance Free Exteriors in Highland Village, TX did absolutely perfect work with no damage to my property. If you are in North Texas and need siding or windows call Robert Smith at 972-966-1834 or check out http://www.maintenancefreeexteriors.com. He’s awesome.

    The one other thing I won’t do is anything roof related. Sorry — scare of heights so that gets hired out.

    Recent Experience

    I arrived in Tennessee and had a recommended general handyman show up on my doorstep the day after my furniture was delivered. I was in no way ready to figure out what I needed help with, but hated to turn this older man away who had set the next couple days away to help me, so I allowed him to start.

    It was a total and complete disaster. Almost everything he started ended badly. Attaching the water line to the refrigerator took three trips to the store. I wanted new locks and he drilled a door wrong so I had to replace the door. He drilled another brand new door and damaged the surface. On the last door he used the wrong drill bit and blistered the paint so badly I will have to refinish the entire door.

    He replaced a half wall of drywall and thought it was okay the replaced sheet was 1/4 inch inset from the wall above it. I had to rehang the drywall after adding sections of 2 x 4’s to get it out level with the other sheet rock.

    I could go on and on. I had paid him for 3 days and when he botched up more stuff on the 4th day and not returned I assumed it was a wash for all the damage he had done. Wrong.

    He called a week later while sitting in his vehicle in my drive demanding payment. When I said we needed to discuss this since I was having to redo or repair so much stuff that I had assumed we were even he threatened me.threaten

    He told me if I didn’t pay him for the last day I would suffer serious consequences. I asked what he meant by the threat and he wouldn’t elaborate, but since he had kept a key from my dead bolt changes I was extremely upset by the threat. He continued to threaten me and I continued to ask for clarification until he hung up.

    As a single woman this kind of stuff is really scary. I have learned there is a certain element of the male population that has no problem doing bad things to women who have no males in their life. I was scared.

    I went to the police department and made a report in case something happened to me or my house. They suggested I pay him just to get him out of my life. The idea absolutely galled me, but I couldn’t disagree. So in the end, while I wouldn’t pay him for the crappy work he’d done I would pay him to get his miserable ass out of my life for good.

    As luck would have it a nice man came that afternoon to replace a water pressure regulator so I called the above mentioned ass and told him he had an hour to come get his money.

    He pulled in the driveway and the plumber walked out to his truck. He didn’t need anything – he just wanted to make his presence known. I could have hugged him.

    When he saw there was a man here (the plumber made a point of walking out on the driveway when he arrived) the weasel wouldn’t even get out of his truck. I walked out and told him I wanted my key. He acted surprised and dug it out of his pocket and once in my possession I handed him the money and walked away.

    Bottom Line

    sad sack

    It was an unfortunate experience so early in my move, but I have no intention of letting it sour me on my decision to come here.

    I still need help with some things, but I get lots of suggestions before letting anyone in my house again. And I will be using Angie’s List as much as I can – although I’m in a rural area of Tennessee and I’m not sure how much help it will be.

    Protect yourself ladies – there are a lot of predatory, lousy workers out there that you don’t need to allow into your home. Learn from my mistake. Be careful.