Author: TheDIYGirl

  • PVC cots for dogs

    PVC cots for dogs

    Nikki and Ellie aren’t the first Labrador Retrievers I’ve had so I am aware of the ongoing genetic issue of hip dysplasia in their breed. I wanted my girls up off the floor with their hips cushioned.

    Both were crate trained for the first 2 years of their life — meaning if I wasn’t home they were in the crate. I loved it because I missed the whole having my home chewed phase. When they hit 2 years old the crate was removed and a cot put in its place. Since they are 2 years apart in age, that means I moved Nikki to a cot when I got Ellie because she needed to be in the crate. I couldn’t face training more than one dog at a time so I spaced them out.

    When I brought Ellie home I started building the frame and sewing the slings for Nikki’s dog cot. I bought enough materials for 4 cots — 2 downstairs where they stay when I’m gone and 2 in the bedroom for sleeping at night.  The whole time I was making the cot I was thinking I’d do all that work and they wouldn’t so much as look at it. Wrong.

    I put the first cot down in the kitchen when I was spending a lot of time remodeling it and they both climbed in. Ellie was really little at this point so they cuddled up together to nap.

    PVC cots for dogs - The DIY Girl
    1st day on new cot — they needed to include their “puppy” toy


    PVC cots for dogs - The DIY Girl
    PVC reasy to assemble
    PVC cots for dogs - The DIY Girl
    Detail of corner fittings with non-slip pads for ceramic
    PVC cots for dogs - The DIY Girl
    First sling mounted on PVC
    PVC cots for dogs - The DIY Girl
    Both slings assembled
    PVC cots for dogs - The DIY Girl
    1st corner assembled
    PVC cots for dogs - The DIY Girl
    Completely assembled cot
    PVC cots for dogs - The DIY Girl
    Level view of cot
    PVC cots for dogs - The DIY Girl
    Nikki and Ellie on current Cordura cots

    Nikki and Ellie are now 9 and 7 years old and they still love their cots.

    If you’re interested in making your own cots I can send you the dimensions I used for these. If you’d rather just put one together, email me and I can make it and ship it to you.

  • Lawnmower maintenance

    Lawnmower maintenance

    My history with mowers

    Lawnmower maintenance - TheDIYGirl.comI have fears regarding lawnmowers. My dad, who had me work with him on almost everything, wouldn’t let me near a lawnmower after a little girl in our neighborhood ran up to her dad while he was mowing and lost the part of her foot. This left a deep impression and fear of lawnmowers in me.

    My mom and dad were out-of-town when I was 18 years old and dad’s beloved yard was looking really scruffy and I didn’t want him to come home to a mess so I pulled out his mower, figured out how to start it, and had the yard looking beautiful when they returned. But I was afraid of the thing and really respectful of the damage it could do.

    After years of mowing my own yard the whole situation was exacerbated a few years ago when I was trying to lift a non-functioning mower into my SUV to return it and things went all wrong. I lost hold of it, slipped and fell, and the mower came down on the end of my right ring finger and completely removed the fingernail. A trip to the ER and referral to a plastic surgeon to have the tip of the finger and nail bed stitched back together did nothing to improve my relationship with mowers.

    CAUTION: Remove the wire from the spark plug and secure it so it can’t accidentally reconnect every time you work on your mower.

    The reality

    My mishap didn’t alter the fact that I’m a homeowner who prefers to mow her own grass so lawnmower maintenance is a natural by-product. Enter the fear. I’m okay running it and walking behind it, but accessing the underneath to drain the oil and remove the blade is another story. The oil would get changed, but the blade was ignored.

    This spring when I dragged out my 15-year-old mower I knew it should have some serious TLC if I wanted it to Lawnmower maintenance - TheDIYGirl.comcontinue running. I bought a new air filter, spark plug, fresh oil and fuel. While under the mower to change the oil I had the wire removed from the spark plug and a 2×4 bracing the blade so it couldn’t move.I decided it was time to screw up the nerve to take the blade off to be sharpened.

    My trip to the local lawnmower repair shop confirmed my belief in patronizing small businesses. Not a peep out of them about how bad the blade was (never sharpened in 14 years) and $8 and 15 minutes later I walked out with a nicely sharpened blade.

    Back home I put the blade back on, poured in a little Seafoam, started the mower to make sure it was running and put it away since the grass didn’t need to be mowed yet.

    First mowing

    Three weeks later I pulled the mower out to mow the grass and no matter how much I yanked the cord, that engine wasn’t showing any sign of even trying to start. Groan.

    I pulled the spark plug and it seemed to be bone dry so back in the house to research on the internet.

    Back outside I removed the piece behind the air filter so I could get to the fuel line to check for clogs. I disconnected the line and gas flowed freely. In the process of removing the filter piece a gasket had torn so I headed off to the lawnmower repair shop for a replacement. $2.45 for the part and lots of advice. They suggested I spray carb cleaner in the carb and see if it would start. It did and promptly died.

    Me rebuild a carburetor??

    So that meant the carburetor was probably gummed up in some way, but I had never worked on a carburetor in my life. Back in the house for youtube videos and back out to remove the carb. Once off the mower and the bowl removed I found gummy deposits that I cleaned up, but didn’t know if it would solve the problem. The o-ring around the bowl was completely shot so I headed back to the repair shop with the carburetor in hand.

    The rebuild kit for the carburetor was $9.95. Do you believe it? Less than $10. The man behind the counter cheerfully offered to put the rebuild kit on for me. I had to resist the urge to leap across the counter to hug him. Fifteen minutes later I walked out with a freshly rebuilt carburetor and once home I re-installed all the removed parts and the mower started on the first try.

    Lessons learned

    1. When I had added fresh fuel I had dumped in Seafoam, run the mower for all of 60 seconds and then put it away. I wonder if the Seafoam liquified crud and since I didn’t run the mower long it made it possible for it goo the carb up. I love Seafoam and use it in my car and motorcycle, but I think I will be cautious to add it only when I will run an engine for a decent period immediately following.

    2. The internet makes it possible to successfully repair things I never would have attempted before. There are kind folks who take the time to video step-by-step how to diagnose and repair. Bless them.

    3. Local lawnmower repair shops are wonderful. I think my experience with my motorcycle has made me cynical. Motorcycle shops don’t want to offer advice because they want you to bring your motorcycle in for repairs. So I was pleasantly surprised by the help and advice I received despite only buying items for a few dollars. Even other customers were making suggestions that helped. I called the shop the next day and thanked them for their help after I mowed my lawn with the newly repaired mower 🙂

    4. With a little love and care even a cheap lawnmower like mine can give years and years of service.

    5. While I always add fuel stabilizer to the gas can where I store fuel for mower I think I will change that fuel to premium grade. All the guys at the shop seemed to think it would hold up better over time.

    6. Do not forget to remove the wire from the spark plug and secure it so it can’t accidentally reconnect every time you work on your mower. I know — I’m nagging, but mowers scare me.

    The only tools this required were a couple screwdrivers,  a wrench, and some carburetor cleaner. If I can keep a mower running for 15 years anybody can.

  • Nikon D70 camera fix

    Nikon D70 camera fix

    This post isn’t really about my camera – it’s about working on something I’m afraid of.

    I bought a used Nikon D70 camera from a professional photographer friend in January 2009. Since then that poor camera has been bounced, vibrated, and jiggled over thousands of miles on my motorcycle. For two months it was in ocean coast conditions so humid the lens fogged and had to be sent back to Nikon for repair – but that was under warranty. All to say the camera has not led an easy life in the 3 years I’ve had it.

    A year and a half ago I started getting CHR and FOR errors when trying to take pictures and when I downloaded the images to my computer some would be corrupted with unexpected end of file errors. It was occasional at first and over the last year and a half has deteriorated until recently I took pictures and three quarters of them were corrupt.

    Anything that’s under warranty I let the pros handle — that’s part of what you pay for. But this camera is way, way out of warranty so I would have to pay for repairs myself.

    Internet research

    I researched and found posts that suggested several solutions: 1) clean the compact flash pins on the camera 2) take the camera apart and connect the cable for the compact flash that may have become partially disconnected 3) check for bent pins and replace the compact flash connection 4) buy Nikon batteries since the off brand batteries can cause errors.

    Being a coward with my newly acquired first ever dSLR camera I took the least invasive solution and tracked down a pin cleaner for the compact flash pins. It helped a little for a while. I was skeptical about the battery idea, and afraid of opening the camera to check the compact flash or replace it.

    Cleaning the pins wasn’t a fix so I reread the posts and tracked down a D70 repair manual online and downloaded it. There were great illustrations of the screws to remove and where the actual cable for the compact flash was located and what direction it was connected in.

    Nikon D70 camera fix - TheDIYGirl.com

    Then I research how much it would cost to have someone take a look at the camera — $200 just to open it. I wasn’t sure if I should pay that much, just replace the camera ($800 I can’t really afford), or try the repair myself. In the end I decided the only logical thing was to see if I could open the camera myself.

    Getting over the fear

    The most difficult task was finding a tiny screwdriver for the screws. I made a diagram of the bottom of the camera and marked it with the various sizes of screws I removed so I would make sure I got them back in the right place – there were 3 sizes.

    Nikon D70 camera fix - TheDIYGirl.com

    I got the bottom off the  camera and with the help of the diagrams located the cable. I took a small screwdriver and

    pushed on the plastic cap of the ribbon cable and was pretty sure it moved. It’s really small, so I wasn’t entirely sure. I pushed on both sides of the cable cap a couple times to make sure it was firmly attached and put the camera back together again.

    I took pictures with no CHR or FOR errors. I downloaded the images to my computer and they were all good with no corruption errors.

    I will continue to monitor how the camera does and if it behaves itself will probably replace my off brand batteries with ones I found on Ebay that are compatible.

    My point to this post is that I am totally intimidated by my dSLR and was afraid to open it up. Home repairs – no problem. dSLR cameras very scary. The first time I cleaned dust off the sensor I was scared to death I’d screw up the camera.

    When I did the work I made sure I had a clean work area and carefully tracked what I did as I disassembled. I was very, very, very gentle with the cable for the compact flash.

    But in the end – it was no big deal. I did what was needed and got the camera back together with no problem. And I’m very hopeful it will resolve all the errors I’ve been having. It took me all of 20 minutes, didn’t cost a dime, and bolstered my confidence that I can deal with a complicated camera.

    So far, so good with the camera – no errors or corrupt images. Maybe dSLR cameras aren’t quite so scary after all. Maybe some other repairs I’m hesitant to try wouldn’t be too scary either.


  • Sprite Industries Shower Filter – Product Recommendation

    Sprite Industries Shower Filter – Product Recommendation

    I’ve had one of these for a while and I think they’re great. Who wants to douse their hair and body with chlorine every time they shower? It’s very drying for your skin and your hair.

    The filter assembly is pictured left and the replacement cartridges are on the right. The assembly comes in white, chrome, or gold and the filter inside is supposed to last a year — you reverse it after 6 months. You simply install it before your current shower head. I suggest you use Teflon tape on the threads. After 6 months you screw it open and reverse the filter and 6 months later you put a new filter in. They provide a little plastic cling sticker so you can mark down the date to change it and put it in the shower.

    The only problem might be for really tall people since it lowers the shower head. Not a problem for me at 5′ 3″.

    Supposed to remove chlorine, rust, sediment, hydrogen sulfide and heavy metals with the HOC cartridge.

    Sprite Industries Shower Filter - Product Recommendation - TheDIYGirl.comAll I can tell you is that my hair and skin are softer when using it and I know (if I’ve ignored the sticker) when the filter needs to be replaced because I start getting dried out again. The filter may not last as long if multiple people use the shower every day, but it’s worth every penny.

  • Removing soap scum – great article!

    Removing soap scum – great article!

    As part of my shower repair project I wanted to do a really good cleaning to remove soap scum and hard water accumulation. A job I absolutely dread — partly because it’s such hard work and because I’m never sure what’s the least painful product to use. I’m always worried I’ve missed some great product that would make it really easy.

    Enter the Manly Housekeeper. He explains why soap scum and hard water become such a problem and then tests 6 well known products to see which works best. He taped off 6 sections of a glass shower wall and took pictures of how each one worked. Check out the whole article at:

    http://www.themanlyhousekeeper.com/2011/03/11/solved-soap-scum-and-hard-water-stains/

    Needless to say I promptly went out and got Barkeeper’s Friend to clean my showers. Thank you to the Manly Housekeeper for the work and great information! I’ll be checking out more of your articles.


  • Shower Spray Recipe

    Shower Spray Recipe

    After recently doing a refurb on my 28 year old shower stall and realizing I had no soap scum and hard water stains to remove I thought maybe I should share the shower spray recipe I use:

    Shower Spray Recipe

    • 1/2 cup alcohol
    • 1/2 cup peroxide
    • 6 drop of Dawn dish soap
    • 1 tsp Jet Dry

    Get a 32 oz. spray bottle, add the alcohol, peroxide, and Jet Dry. Fill to top with water. Add 6 drops of Dawn. (Adding the Dawn last prevents soap bubbles when you fill the bottle with water.) Spray shower after every shower.

    I don’t know why this works so well. The Jet Dry will help the water sheet down. The Dawn is such a great grease and oil cutter, I have no idea if the alcohol and peroxide prevent mildew, but I do know I don’t have a problem with it in my shower.  It’s cheap, it’s easy, and it works.

    One last hint — after having to look up the recipe on my computer a couple times the light finally went on that maybe I should put the recipe on the bottle. I tried a fine point permanent marker, but it eventually washed off. It does stay in the shower after all. I typed the recipe on my label maker and that seems to be a permanent solution. When it empties I have the list of ingredients right on the bottle.

  • Shower stall re-grout and re-caulk project

    Shower stall re-grout and re-caulk project

    Defining the problems

    I have two showers stalls with ceramic tile walls and floors and glass doors and both are in need of repair. The master bathroom gets the most use and is in the worst shape so I’ll start with that one.

    The master bathroom shower had been “repaired” by the previous owners of the house and they had chosen to use white caulk along the seam where the walls and floor meet and about 12″ up 3 corners. This caulk is deteriorating and cracking. I want to completely remove the caulk and replace with white grout like the rest of the shower.

    The previous owners had also used white caulk on the seams where the shower doors meet the ceramic shower wall and this is starting to crack so I want to completely remove it and reapply fresh caulk sealing the glass wall and doors to the stall.

    Lastly, they had smeared caulk around the escutcheon plates for the hot and cold faucets so it looks terrible. I want to remove it and figure out what’s the proper thing to do with the plates. More on this later since I have to do some research.

    Overall project steps:

    1. get organized
    2. remove deteriorated caulk and grout
    3. reapply grout
    4. reapply caulk
    5. shower clean up

    Learning how to do it

    Obviously the first step in this project is removing the old caulk. I started with research on the internet and found a great article  at PopularMechanics.com that pretty much told me everything I needed to know about the removal. http://www.popularmechanics.com/home/improvement/interior/4213124

    To summarize their steps:

    1. Apply caulk remover
    2. Cut through softened caulk
    3. Pull the caulk out of the joint
    4. Rake remaining caulk from the joint
    5. clean the surface of soap scum and apply bleach solution to kill mildew
    6. apply tub and tile caulk with fungicide

    I strongly suggest you read their article for a little more detail.

    Suggested List of Tools and Supplies

    • caulk remover
    • window scraper
    • utility knife
    • needle-nose pliers
    • small screw driver (for digging tough stuff out)
    • rags
    • bucket for debris
    • protective covering for hands (I’m really bad about doing this)
    • cleaner to remove soap scum (not ammonia since you’ll follow up with bleach!)
    • small spray bottle (for bleach solution)
    • acrylic or silicone caulk

    Finding the remover

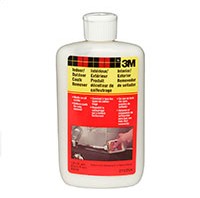
    Popular Mechanics recommended 3M Caulk Remover and I wanted to try it, so the first task was to track that down. Although I love the simplicity of ordering from Amazon and having the stuff show up on my doorstep, I wanted to start working on the project and didn’t want to wait a few days for shipping.

    I tried the obvious places first — the big box home improvement stores — but neither listed it online so I ran by a store to see if they might carry it locally . No luck. I found it online at Ace Hardware so I called the nearest store and they had one bottle left on the shelf.

    Working with the remover

    A little warning about working with the 3M Caulk Remover. The remover needs to sit on the caulk for a minimum of 2-3 hours before you can start removing the caulk. If the caulk is older  and really hardened or it there are several layers of caulk it would need to sit even longer. So plan in advance to apply this remover and go find something else to do while it works.

    The bottle is only supposed to cover 24 linear feet of caulk and I was running close to that limit so I didn’t want to overuse the product. A lesson learned the hard way — if the remover doesn’t cover the caulk it doesn’t soften anything, so make sure you have complete coverage without smearing it all over. Just make sure you have a thin layer covering all the caulk.

    The great thing about this remover is that it truly clings to vertical surfaces and doesn’t run down. I had a lot of vertical caulk to remove and there was no problem getting the remover to stay in place.

    I came back a couple of hours later and started loosening the edges of the caulk with a simple window scraper like the one pictured here along the metal frame of the glass shower walls. I used a utility knife to clean out the seam between the ceramic walls and floor. I was afraid to use the utility knife on the metal frame since it might score the metal.

    Once cut loose it’s a fairly easy process to pull the caulk away and as the Popular Mechanics article mentioned I did have to use a needle-nose plier at times to grab the caulk. It quickly became evident where I missed covering with the remover since that section wouldn’t let go and it took a lot more work with the razor blade to get it loose.

    Be prepared – the process is a little messy because of the runny remover and then the somewhat melted state of the caulk itself. I kept a bucket next to me to put the gelatinous mess into as I removed it. The 3M Caulk Remover worked great and with only a couple of hours work I had the caulk completely removed.

    As suggested in the article I washed the surfaces where the caulk had been. Popular Mechanics next suggested using a foam brush to work in a bleach solution into the crevices. Since it wouldn’t take a large amount of the solution I got a small spray bottle with water, added a little bleach and sprayed down the areas where the caulk had been removed. So the bleach would have ample time to kill mildew I re-sprayed a while later and let it all dry overnight.

    Before working in the shower again I thoroughly wiped the floor down to remove any bleach residue. I didn’t want to accidentally track bleach out of the shower and damage something.

    Product comparison

    Okay — now I’m annoyed. I ran out of the 3M Caulk Remover and I needed to remove the caulk that was smeared all over the faucet escutcheons and the wall where they have been caulked. I was too lazy to go back and get another bottle of the 3M and bought what was available at the nearest big box home improvement store. It wasn’t exactly being lazy — I had bought the last bottle at Ace and was afraid they hadn’t had a chance to restock.

    The employee who helped me at the big box recommended Motsenbocker’s Lift Off (it was all they carried) and a caulk remover tool. I asked her if the stuff works and she said customers had said it worked okay. I was skeptical but bought it anyway.

    The bottle said you had to remove as much caulk as possible, but it said you only had to wait 2-3 minutes as opposed to 2-3 hours. So in my opinion it makes it a caulk residue remover instead of a true caulk remover. It suggested you check for colorfastness first, but that wouldn’t be an issue with ceramic tile and metal.

    The results

    The Motsenbocker’s is a gel that comes in a spray bottle. First thing — the caulk remover ran down the wall no matter what I did. Next the plastic caulk remover tool promptly melted and the edge became jagged when I scraped the old caulk off the shower wall. Great. And I noticed my hands were burning where ever the remover had come in contact with my skin. Then I went over to the counter to remove the caulk from the metal escutcheon plates and apparently the plates had a protective plastic coating that melted from the remover.

    This is directly off Mostenbocker’s website:

    Safe On:
    Hands • Tools • Fiberglass • Hard Surface • Flooring • Fabrics • Carpet • Ceramic • Stone • Wood • Plastic • Metal • Vinyl • Foam Application Equipment & More!

    Safe on hands, plastic, metal? I don’t think so. And the fumes in my bathroom were awful from the supposedly eco-friendly product. I was left in a quandary of where to wash up since I didn’t want the caulk remover to ruin any of my sinks.

    Summary of my experience with caulk removers:

    Issue Motsenbacher’s 3M Caulk Remover
    safe for hands? burns skin no skin irritation
    vertical surfaces product runs product stays put
    fumes unpleasant & lingering none noticed
    melts plastic? yes yes
    product performance had to apply repeatedly one application worked
    preparation had to remove caulk none – just apply


    What will I do in the future? In all fairness I think the 3M Caulk remover melts plastic too. I had a plastic handle utility knife and the color was coming off on my hand because of the remover. So be careful what tools you use and what you use the remover on.

    Next time I’m going to prepare in advance and order the 3M or drive to a store where I can purchase it. The Motsenbocker’s and ruined caulk remover tool are going back for a refund tomorrow.

    Okay — now on to re-grouting the shower.

    Grouting steps:

          • Mix the grout with water
          • Let mixture rest for 5-10 minutes
          • Push grout into gaps and smooth out
          • Wait 10-20 minutes
          • Remove excess grout
          • Allow to dry 30-45 minutes
          • Polish with soft cloth
          • Wait 2-4 hours
          • Lightly mist grout several times a day for 3 days

    Tool list:

          • Grout
          • Plastic cup
          • Stirrer (I used a plastic spoon)
          • Nitrile gloves
          • Rags
          • Soft cloth
          • Spray bottle with clean water

    I didn’t have a lot of grouting to do, but the process is long whether it’s a small amount or an entire shower. There are multiple steps and the grout will need to cure for 3 days after it’s done. None of the steps are difficult, but each is important.

    I had a 1 lb. box of white grout (the image at right is the grout I used) I had used before and kept stored in the garage. The box specifically said it was for gaps no larger the 1/8” and none of mine were that large. The box also said it contained Portland Cement and gloves and face protection should be used. I wore gloves, but for such a small amount didn’t think face protection was needed.

    Note: If you aren’t using a new box/bag of grout you might want to run it through a sieve to get lumps out. My grout had apparently formed some clumps from moisture out in the garage and they didn’t break down when I mixed the grout. It was a pain to deal with and in retrospect I should have thrown it out and started again with sifted grout that didn’t contain the lumps.

    I added water and mixed the grout until it was a stiff paste and wasn’t runny. The directions on the box say to let the grout rest (they used the word “slake”) 5-10 minutes. Since it was a small amount I went for 5 minutes.

    I applied the grout using my finger (wearing nitrile gloves) since the grout was going in corner joints. I pushed as much grout into the joint as I could and then smoothed it out with my fingertip. The grout doesn’t need to be perfect at this point, but the gaps should be thoroughly filled with grout.

    Wait 10-20 minutes for the grout to firm up.

    I used a rag that that had been completely wrung out (a sponge also works) and wiped in circular motions to remove the excess grout. I rinsed out and wrung the rag regularly to keep it clean. When I was finished the grout was cleaned off the tile surfaces, and nicely filled in the gaps. This will be how the grout looks when dry, so I made sure it looked good before allowing it to set up.

    The grout to needed dry for another 30-45 minutes before I could wipe the surfaces with a soft cloth to polish the last haze of grout from the tiles.

    Curing process: The grout needs to cure for 3 days and should not be allowed to get completely dry. Several times a day I lightly misted the new grout with a spray bottle of plain, clean water to keep it slightly damp.

    That’s it. At the end of three days the grout was dry and ready for normal use. My shower wasn’t ready yet since I still had to replace the caulk sealing the shower walls to the ceramic.

    Tool list:

          • Caulk
          • Caulk gun
          • Utility knife
          • Nitrile gloves
          • Rags or paper towels

    What kind of caulk to use

    When I went to the store to buy a new tube of caulk I was still undecided about using acrylic or silicone. There was some hard water damage to the metal frames of the glass shower walls that would be hidden by white acrylic so I was leaning in that direction. As the Popular Mechanics article had suggested, I wanted something that was anti-microbial and would discourage mildew growth.

    I had a tube of white acrylic in my hand when I stopped to read the labels on the silicone caulk. It said things like 10 year mold free, permanently waterproof, flexible, shrink/crack proof. Hmm… When I had removed the caulk the previous owners had put in the shower I discovered they had caulked over the original clear silicone. That original silicone was still flexible and really stubborn about coming out of the seam. Since I wanted totally waterproof and really long-lasting I bought the GE Silicone II Supreme.

    Applying the caulk

    I have always been kind of frustrated because I totally suck at applying caulk. I get too much on, get it all over everything (me included), and it never looks like a professional job. I finally figured out what I always do wrong — I cut the opening on the tip of the caulk tube too big. This time I used the utility knife to cut maybe less than an 1/8″ angled opening. It was so small the piercing tool on my caulk gun barely fit in the hole to open the membrane sealing the silicone. What a difference a smaller opening made.

    Note: the smart thing to do would be to wear gloves so you don’t make a mess of your hands.

    I applied a thin line of caulk to where the shower walls met the ceramic tile, wiped it down with my fingertip to smooth it out and make sure it was in the gap, wiped my fingertip clean on a paper tool and before I knew it I was done. The lines of caulk looked perfect and for the first time I didn’t have caulk everywhere.

    What to do with the escutcheon plates

    The last thing I needed to do was reinstall the escutcheon plates for the faucet handles. After researching on the internet I decided to use the silicone caulk to seal them to the walls. The plate itself has a rubber seal around the center hole to prevent water from getting behind the plate and into the wall behind the shower. There were a lot of differing opinions about whether to seal them and what to use. Sealing them seems like a no-brainer to me — who wants moisture and mold developing behind the plates or allowing water to get behind the ceramic and into the wall?

    The bottom line was the seal needed to be easily removable if a problem developed with the plumbing later and I knew the silicone could be quickly cut through for access to the wall. I applied a thin line of silicone all around the escutcheon plates and smoothed it out.

    Note: Some people suggested packing the hole where the plumbing comes out through the ceramic and plumbers followed up with comments that it was a really bad idea. Others had used plumbers putty and another plumber noted there are only 3 uses for that putty: 1. seating a drain in a sink, 2. seating a sink on a counter, 3. seating the faucet on a sink.

    Lesson learned

    If you cut the hole on the caulk tube too big, you apply too much caulk, you have to wipe all the excess (and wasted) caulk off, and you get it everywhere. From now on I will start with a small opening and only make the it larger if needed.

    The important thing is how the silicone holds up over time, but as far as application I would recommend GE Silicone II Supreme.

    I’m down to the final clean up and the shower will be done.

    The last step

    I wanted to do a thorough soap scum and hard water residue removal to finish the shower. I had removed the plastic hot and cold water knobs and the shower head and soaked them in white vinegar to remove the hard water. The black plastic on the shower head had started out white and crusty with hard water and after soaking was perfectly clean. I replaced those after they were clean.

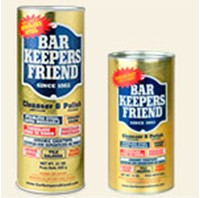
    As mentioned previously I had purchased Barkeeper’s Friend on the recommendation of the Manly Housekeeper in his article on soap scum removal. So I got in the shower figuring I would have to kill myself scrubbing off soap scum, etc.

    Guess what? There wasn’t hardly any there. The only thing that was stained a little was some the grout in the floor from me tromping in and out working on the grout and caulk. I still used Barkeeper’s Friend to scrub the ceramic and glass walls top to bottom and got a brush to scrub the floor. When I was done the floor looked as pristine as the walls.

    So why no soap scum?

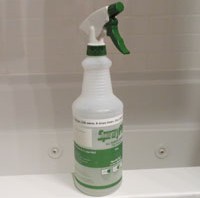
    Because of the glass walls on 2 sides I had started using a shower spray a few years back. I hadn’t been particularly thrilled with its performance (I still had hard water and soap scum that had to be scoured off) and really didn’t like the cost. I figured there had to be a way to make a cheaper version at home so I started doing research. Feel free to research yourself, but after reading several ideas this is the concoction I’ve been using for the last 3 or 4 years and it has significantly cut down on shower cleaning.

    Here’s a link to the shower spray recipe.

    The finished shower

    Not bad for the original shower in a 28-year-old house. Yes, I know I need a bathroom update, but I don’t want to spend the money on it right now, so I’ll keep maintaining what I’ve got. And what did it cost me to do this refurb? I used tools I already had and spent about $20 on Barkeeper’s Friend, 3M Caulk Remover, and GE Silicone II Supreme Caulk. Not bad at all.

    Shower stall re-grout and re-caulk - Step 5 final clean up

    Shower stall re-grout and re-caulk - Step 5 final clean up

  • Introduction

    The DIY Girl Background

    Some background on the DIY Girl and as explanation for how I approach projects.

    I don’t believe in spending one more penny on repair and maintenance than I have to. If I invite someone into my house to do it they are going to charge a lot for their time (and hopefully expertise). If I figure out how to do it properly and do the work myself I can save a ton of money. Money that can go to fun things instead of fixing things.

    We all have our limits and our priorities and there are plenty of folks who want the only tool they use on home repairs to be a credit card. I get this because I draw the line on some things too. Examples — new roof, new siding and windows, hanging large pieces of ceiling drywall. I wouldn’t be caught dead on my roof and I know there are t-bars you can make to hold drywall up to the ceiling, but I just don’t want to go there.

    Some other things that affect what I will and won’t do. I have a 3 story house that scares the bejesus out of people (including me).  When my roof gets hail damage and needs to be replaced most roofers turn the job down due to the height and steepness of the roof. I don’t blame them; as I said I wouldn’t be caught dead up there. The height of the house makes other things difficult too and I will point those out as I go along.

    And one last house issue. It was built in 1984 so I am maintaining a 28 year old house on a heavily wooded lot. Anyone who has a lot of trees knows it adds to exterior house and yard upkeep.

    Last issue is my size. I am 5′ 3″ and petite. I’m strong for my size, but come on — it’s nothing in comparison to a strong man. So I am constantly devising workarounds so I can accomplish what I want. But sometimes I hit a brick wall and simply am not big enough and strong enough to do some things. And it ticks me off…

    The biggest reason I do the repairs I do is because it’s fun. It’s fun to figure something out that not everyone knows how to do. When the project is all done and looks great it’s so satisfying.

    How Post will be Organized 

    I have run across some how-to’s that would explain brain surgery in these steps: 1. open skull, 2. operate, 3. close skull. Gee — that was helpful. Now I feel like I can perform surgery myself. If I post anything remotely like this please feel free to send me a nasty email or comment. I hope to be a tad more helpful than that.

    The opposite is sometimes I feel like I have to wade through pages of blah, blah, blah to finally ferret out what I need to know. If you are that type of person I will have a summary of steps at the beginning of every project and then go into the blah, blah, blah :-). Seriously — I want to provide enough information that a person who has never done something like it feels that they can do it successfully. And don’t forget you can also post questions in the comment area and I will respond.

    Icons I will Use

    Below is a little menu of icons I will use in posts to let you know when I’ve done something dumb, found something great, etc. I will include it in any posts I use an icon.

    And Last of all…

    Don’t forget this is supposed to be fun. If you’re having a bad day and things aren’t going well I suggest you walk away from it if possible. Regroup, ask more questions, get your sense of humor back, and try again later. I can’t tell you how many times I’ve walked away from something I was having trouble with and once I’d mentally let it go gotten a sudden flash on how to solve the problem. Stressed brains can’t come up with creative solutions, so take a break.

    Let’s get started!

    The DIY Girl

  • Repair leaking bathroom faucet handle

    Repair leaking bathroom faucet handle

    I have Delta/Delex faucets with separate hot and cold water handles. The first time I had a leaky faucet I took out the old valve stem and went to a home improvement store and asked them to help me match it. I purchased a box of 5 valve stems, springs, and seats. I figured this wouldn’t be the only leak since I have 6 identical faucets in three bathrooms.

    Tool list

          • Phillips head screwdriver
          • channel locks
          • needle-nose pliers
          • small screw driver
          • rags

    I turned the water off under the sink going to both faucets. The turn valves don’t seem to age well and this always makes me a little nervous since they can break. I once had a valve to a toilet break and start pouring water into the bathroom until I shut the water main off. Which brings up a good point. Before starting a plumbing project make sure you know where the main shut off is and how to turn it off (some need a tool) just in case something goes wrong unexpectedly.

    To get to the valve stem I had to pop the caps that say “H” and “C” on the top of the faucet handles, remove the screw, and remove the plastic handle.

    The handle is screwed into the top of the valve stem. To get the valve stem out on the Delta/Delex there is a brass ring that needs to be removed. I wrapped it in a cloth (to prevent damage to the ring) and used a channel locks to turn counter-clockwise and remove the ring.

    If the ring has gotten stuck due to hard water deposits, I have had to soak a cloth in white vinegar and wrap it around the ring. I let it sit for a few minutes to allow the acid in the vinegar to work on the deposits. DO NOT get too aggressive if the ring is stuck since you could turn the entire thing and kink the copper tubing under the sink.

    Once the ring was off I still had a hard time getting the hot water valve stem out and had to work around the edge with a small screwdriver prying it and while being careful to not gouge up the brass.

    When the old valve stem was out I used rags to soak up the water down in the hole. At the bottom is a round black rubber seat. I removed it with a needle-nose plier. Once that was out I could see the spring under it and removed it also. I took care to note the direction of the seat and the spring when I removed them so I could make sure I put the new parts in correctly. The spring is narrower on one end and needs to go in the correct way.

    If I’m replacing a valve stem I go ahead and replace the seat and spring while I have it disassembled. I’m never sure what exactly is leaking and it seems wise to start with all fresh parts.

    I put the seat over the spring, grabbed the assembled seat/spring with a needle-nose and inserted them in the hole. I used the handle end of a small screwdriver to push the seat down into place.

    Once the seat and spring were in, it was a simple matter of putting in the new valve stem and screwing down the brass ring. I was careful to tighten the ring, but stop when the whole thing started to turn — again not wanting to kink the copper tubing under the sink.

    I screwed the handles back on, popped the “H” and “C” in making sure they were on the correct handle.

    I turned the water back on under the sink and tested both faucets. No leaks!


  • Refinishing rusty metal – Ospho

    Refinishing rusty metal – Ospho

    When I bought my house the 2 decks on the back were cantilevered (supported by floor joints extending outside the house), but they had never been cared for and were literally rotting off the back of the house. I decided to have those decks removed and replaced with decks supports by steel posts.

    The steel posts will probably be standing when everything else is gone, but they are a maintenance issue since every nick or crack in the paint is an opening for rust formation. After 10 years there were quite of few rusty places and the white paint on the posts also had a black film developing so it was time to refinish the posts. All 14 of them. Groan.

    I have a friend who is a boat captain who had great suggestions on how to clean up and refinish my rusted metal. His experience with metal boat hulls in salt water provided the best product imaginable for this huge project – Ospho. I had never heard of it and I can’t tell you how happy I am that I did. If you have exterior stuff that is rusted and you want to stop the rust dead in its tracks, this is the stuff to use. Quoted from the Ospho site “When applied to rusted surfaces, OSPHO causes iron oxide (rust) to chemically change to iron phosphate – an inert, hard substance that turns the metal black.” They list the stores that carry it on their website. http://www.ospho.com

    There was no way I was going to completely strip all 14 posts so my plan was to remove all visible rust and bad spots, sand the remaining paint, and refinish from there.

    While the write up for this project isn’t long, it was an extremely tedious multi-day project so I’m not telling anyone it’s easy. The results are awesome, however. The steps I followed would work well for any outdoor rust problem whether it’s posts, a fence, etc.

    Steps of project:

    1. Remove all visible rust down to clean metal
    2. Sand entire posts
    3. Apply Ospho
    4. Apply Primer
    5. Apply 2 coats of paint

    1. Grind off rusty areas. I had to get rid of the black film that was forming and I wanted to make sure there was no oil or grease on the posts, so I scrubbed them all down with a good cleaning solution first and let them thoroughly dry.

    The instructions for the Ospho product I was going to use stated: “You do not have to remove tight rust. Merely remove loose paint and rust scale, dirt, oil, grease and other accumulations with a wire brush.” Despite what Ospho said, I decided to use a grinder with a wire brush attachment to remove all the rusty spots. I didn’t want a bumpy surface on the posts and I wasn’t sure how it would look if I left the rust, so I spent a couple days grinding away the rust.

    2. Sand the posts. I wanted the primer and paint to adhere so I sanded the remaining paint with medium grit sandpaper and them wiped them down to remove the debris from grinding and sanding.

    3. Apply Ospho. Ospho is a pale green liquid that is a little runnier than a gel. I used a paint brush and painted a coat of it on the posts from top to bottom, even over the paint in case there was rust that wasn’t yet visible to me. I let it do it’s thing overnight.

    4. Apply primer. I wiped the posts down with rags to remove any powdery residue from the Ospho and applied oil base white primer and allowed it to dry overnight. My posts are white, so I didn’t want to start with a gray primer.

    5. Apply 2 coats of paint. I lightly sanded the posts before each coat and applied 2 coats of oil base Rustoleum paint.

    Doesn’t sound that bad, but I did this during Texas summer in 100 degree heat. Grinding the posts took a couple days, as did each coat of paint on that many posts. Due to high humidity I let everything dry at least 24 hours.

    It was worth the effort, because the posts were back to snow white and beautiful.

    Refinishing rusty metal - Ospho - The DIY Girl