 I am a big advocate of good tools for painting since they make a huge difference to how difficult it is, how long it takes, and how it turns out. Buy good tools and take care of them and they will last for years and years. So I thought I’d run down my favorite paint tools and why I think they’re essential.
Paint
It doesn’t matter how great your painting tools are if you’re applying poor paint. Bad paint isn’t just a pain to apply — it’s a pain to have on the walls since it doesn’t clean up (it wipes off instead) and then it will be a horror to cover when you decide to paint again using a better paint.
I don’t mean paying $70-100 per gallon either. Read reviews like the ones available on the following links and decide. Both say Ace Royal is a great paint for the money. You don’t want paint that spatters and takes multiple coats to cover. Most people need paint that’s scrubbable too.
http://www.consumersearch.com/interior-paint
Telescoping roller extension pole
 I bought a quality fiberglass extension pole for rollers a long time ago, have used it too many times to count, and it’s still in great shape even though a little paint spattered. I don’t mean something like a broom handle, but a light-weight non-flexing pole that is expandable. What’s important is that the pole locks so it doesn’t slide when extended and the threaded part holds the roller frame tightly so it doesn’t loosen all the time. Painting stairwells and ceilings while standing on the floor (or stairs) is worth it’s weight in gold. They cost around $25.
Roller frames and rollers
 Don’t go cheap on the frames. Screeching frames are no fun. Good ones, if cleaned after each use, they will be nice to use for years. I recommend everyone have at least 9″, 6″, and 4″ for different projects.
Don’t go cheap on roller covers either or you may have lint and fuzz coming off on your walls. This is another time quality product can be cleaned and reused for years. I have to admit I wish I could just pull off the used roller and pitch it in the trash, but that is so not environmental I make myself do the dreaded roller washing after painting. Anyone know a quick easy way to clean rollers and brushes?
Pelican Pail and Liners
I’ve only had my Pelican Pail for a couple of years and don’t know how I worked without it before. It has a magnet that holds a brush in place and it’s designed for hanging a 4″ Wooster roller frame from the edge. It makes cutting in a room so much easier that painting a room takes less time. I love the thing and really enjoy disposing of the messy liner when I’m done for the day.


Roller pan liners
I have found a transparent green liner that is rigid enough to use alone and wash if you want to reuse. Walmart has them for around $1.50 so it doesn’t break my heart to dispose of them. The flimsy ones you have to put in a metal tray are more trouble than they’re worth in my book.
Edge painter
 Rather than precariously reach from a fully extended extension ladder to get that corner spot at the top of the stairwell use your extension pole and the Trim Smart from Mr. Longarm. It’s a life saver — literally. I recently painted my kitchen that has cabinets on the walls where the cathedral ceiling peaks. There was no way I could get a ladder so that I was anywhere within striking distance of cutting in the ceiling for several feet on either side of the peak. I went out to the garage, dug out my Trim Smart, put it on my extension and got it painted without killing myself. Just be careful to not load too much paint on it so it squeezes out in places you don’t want it. I used my 4″ roller to apply paint to the pad. Just playing it really safe since I couldn’t reach the spot to fix it if I messed it up.
Shur-Line Gallon Store and Pour Paint Can Lid

This ad for the Store and Pour Can Lid says you can store paint long-term with this lid, but I haven’t tried that. I use it while painting for several reasons.
- It makes pouring paint incredibly clean and neat.
- It keeps the edge of the can clean so you can use the original lid for storage and get a really good seal with no paint running down the side of the can.
- The lid keeps the paint sealed up while you’re working so it doesn’t start drying out on top even if you take a break.
- It washes up easily so it can be used over and over again.
Glad Press’n Seal
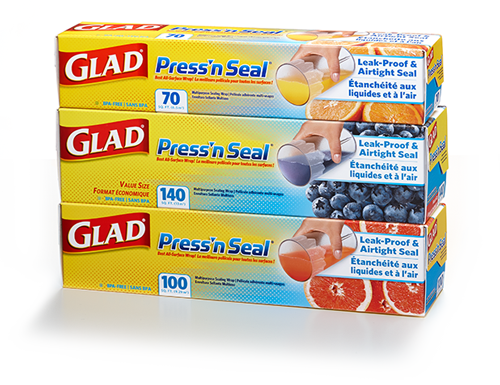 Weird painting tool, but this is my latest painting discovery. I have painted
 an almost obscene amount an awful lot of cabinets and bookcases using a small roller pan for multiple coats of primer and paint on each project. That could add up to an almost obscene amount of clean up which tends to make me cranky.
I tried foil for the small roller pan with okay results. Then I decided to try Press’n Seal and fell in love with it. It’s sticky so it stays in place, but pulls up easily when you’re ready to clean up.
I also use Press’n Seal to wrap brushes and rollers before dropping them in a zip lock bag and sticking them in the refrigerator overnight. It keeps the paint wet and contains it so I just have to peel off the plastic and dispose of it before painting another coat.
If you’re working around things like a toilet tank that you’d rather not slop paint all over you can wrap it in Press’n Seal until the paint is dry.
It’s a great paint tool and I keep a large roll on hand for projects.


If you have any favorites let me know — I’m always looking for ways to making a paint job easier.