Author: TheDIYGirl

  • DIY Super Grip Lock for deadbolt

    DIY Super Grip Lock for deadbolt

    Since one of the complaints about the Super Grip Lock was that it was too small I will preface these instructions with the fact my deadbolt and doorknob are not far apart. It’s about 5 1/2″ center to center. If your deadbolt is much farther, just cut longer pieces of Velcro to fit your door.

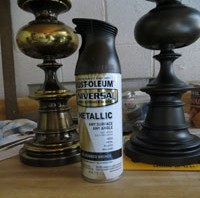
    The last time I checked Joann sells 1 yard packets 3/4″ Velcro for $.99. Wherever you get it, a yard is more than enough.

    Constructing the security strap

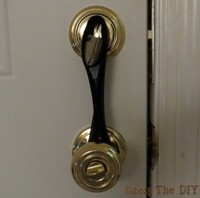
    My deadbolt turn knobs are like an arrow — a flat end and a pointed ended. The flat end is bigger than the pointed end. I measured and a pocket inch high would be perfect for the flat end. Check your deadbolt knobs to see how big a pocket you need.

    DIY Super Grip Lock for deadbolt - The DIY Girl


    DIY Super Grip Lock for deadbolt - The DIY Girl

    All sewing should be double stitch or tight zigzag to make sure it’s strong.

    1. I cut 2 2″ strips of 3/4″ Velcro hook (the stiff side) and sewed them together so it was approximately 2″ by 1 1/4″. This is the pocket.
    2. Sew a 24″ strip of 3/4″ Velcro hook centered on one end of the pocket with the hook on the pocket and the 24″ strip facing the same way.
    3. Fold the pocket lengthwise in half with the hook facing out. Stitch both sides of pocket.
    4. On then end of the 24″ strip opposite the pocket fold 8″ back with the hook side facing out and stitch together.
    5. Cut a 16″ strip of 3/4″ Velcro loop (the softer side) and sew it to the end of the hook strip opposite the pocket that you just sewed double. The loop should face the same way as the open pocket.

    Using


    DIY Super Grip Lock for deadbolt - The DIY Girl
    1. Attach the pocket on the deadbolt knob to the end that applies pressure (pull the knob toward) to the locked position.
    DIY Super Grip Lock for deadbolt - The DIY Girl
    2. Wrap the strap around the turn knob again.
    DIY Super Grip Lock for deadbolt - The DIY Girl
    3. Go down and around the doorknob. Wrap back up and around the deadbolt turn knob and down the other side toward the door knob.
    DIY Super Grip Lock for deadbolt - The DIY Girl
    4. Pinch the strips running between the doorknob and the deadbolt together to hook the Velcro.

    Testing

    After I did one of these I had the door open with the deadbolt thrown and tried my key. I would have bent the key before the deadbolt would turn. I was happy 🙂

    I’m going to make a third one, probably longer, to throw in my bag when I travel that will hopefully work on hotel door deadbolts as well as these do at home.

  • Paint stripper that worked – Crown Tuff-Strip

    Paint stripper that worked – Crown Tuff-Strip

    This isn’t so much about the project, but the product that I used and was very pleased with.

    I have a lamp base made by my grandfather. It’s oak that he had turned on a lathe and then finished with lacquer. I didn’t like the way the lacquer yellowed so I regrettably sprayed it with a textured granite paint years ago. Researching on the internet told me that type of paint is extremely difficult to remove. I haven’t used paint stripper or remover for quite a few years so I had no idea what to try. I really wanted the texture of the granite paint off the lamp base so I would be down to wood grain again. I dreaded the job. I wasn’t sure I would be able to get the granite paint off and I had no expectation of getting the thick layer of old lacquer off.

    Paint stripper that worked - Crown Tuff-Strip - The DIY GirlAfter perusing the options at Lowe’s I decided on a can of spray since this was a fairly small job – Crown Tuff-Strip. It’s described as a heavy duty stripper that clings well to vertical surfaces.

    How it worked

    I took the lamp base and the spray stripper outside so I wouldn’t breathe the fumes. I had purchased chemical resistant gloves to protect my hands. I put the lamp on a piece of cardboard and sprayed one side of the lamp.

    The directions said to use a putty knife to scrape the melted paint off. Because of the curves I was going to end up gouging the wood more than removing the paint. I had a bag of steel wool and switched to using it to wipe the melted paint off. The can said to wait 5-10 minutes after applying the stripper. Closer to five worked best — at 10 the paint was starting to re-solidify. It also worked better doing small areas.

    The paint wiped off amazingly easily, but the process is tedious. Spray the stripper, find something to do for a few minutes, wipe off the section, repeat, and repeat. It took a while but when the paint was off I realized only a couple small patches of lacquer remained, so I worked on them and got them off. The entire lamp is down to bare wood and looks gorgeous.

    I didn’t breathe any bad fumes, didn’t hurt my hands, and with a little over and hour of working I had a clean lamp base. I will definitely use Tuff-Strip again — the product really did perform as the can promised.

    (note: I have no sponsors so this is an objective review.)


  • Changing your in-cabin air filters

    Changing your in-cabin air filters

    Car Repair Tips for Fast Fixes

    Recently I was reading a Family Handyman online article on 5 things you should do for your vehicle and it mentioned changing the in-cabin air filters once a year. If you click on the image to the left it will take you to their article.

    I’d had issues with the filters leading to my cabin. I had parked my vehicle outside at a friend’s house for a few days while we traveled and when I got back the smell in the car was grotesque. A ridiculous amount of money later I found out that in my absence a mama mouse had gotten in there and had a bunch of babies — they all died and made my car smell like an abattoir. As I mentioned, they charged me so much money to clean the mess I figured the dash had to come off. They never once mentioned there were filters involved that could be replaced or should be replaced annually. Great repair shop.

    The Family Handyman article was the first I heard of putting in new filters annually. I checked online and found the filters aren’t hard to access on my Nissan Xterra. You squeeze the sides of the glove box to make it flop down and then release a little string that holds it. The cover to the air filters is behind there. A little more research and I found the air filters (my vehicle takes two) online for $11.

    The filters arrived yesterday so this morning I pulled out the old filters and found they were filthy and still full of mouse poop! They hadn’t even cleaned the filters out! I was not happy to see that I’ve been breathing mouse poop for almost 2 years. I wondered if the filters had ever been changed on my six-year-old vehicle.

    It took me all of 15 minutes to get the dirty ones out and get nice, new clean ones in. This little piece of maintenance it going on my calendar to be done every September from now on.

    Not all vehicles have in-cabin filters, but it’s definitely worth checking to see if you have some that may need to be changed.

    Follow up note: The fan for my heater/AC had been noisy ever since the guys removed the dead mice. Level 3 was annoying and Level 4 was getting really annoying. I figured the mice or getting them out had damaged something.

    I cranked up the AC after putting in the new filters and no more annoying noise, just the normal whirring of the fan. My thoughts? Maybe the fan has to work really hard to pull air through filthy filters and is now able to pull air easily. Seems like filthy filters may be a good way to wear out the fan before it’s time. Another reason to change the filters regularly, that is if breathing clean air isn’t enough.

  • Lamp Update with Rustoleum Oiled Bronze Spray Paint

    Lamp Update with Rustoleum Oiled Bronze Spray Paint

    This post isn’t so much about my lamps as it is about the paint. I love Rustoleum Oiled Bronze Spray Paint! The can said it was good on wood, metal, plastic, and masonry. So far I’ve tried it on metal lamps, plastic coasters and a switch plate and ceramic knobs

    Image courtesy of Rustoleum

    I have two good quality brass lamps that were in desperate need of an update. I toyed with the idea of using brushed nickel spray paint since that turned out so well on the ceiling fan, but decided it would be too light a color. Then it hit me an oiled bronze finish would be perfect.

    How to

    I wrapped up the cord in a sandwich bag and put painters tap around what still stuck out. Another sandwich bag protected the socket from paint. I sanded them a little — there were a couple of spots I wanted to smooth out and I also wanted the paint to stick. Since these take no  abuse I didn’t use primer. We’ll see if that was a good decision.

    That’s all the prep. Don’t forget the little finials that hold the shade in place. I forgot all about them until I was putting the lamps back in the living room and had to go drag everything back out to paint those two little pieces so they would match.

    I did one lamp at a time so I have a good before and after. What doesn’t show in the picture is the oiled bronze paint has a little bit of gold fleck in it that it beautifully reflective. I think that’s what makes this finish really gorgeous.

    Lamps Update with Rustoleum Oiled Bronze Spray Paint - The DIY Girl I want to get new shades but this is one of the lamps and the plastic coaster I had that were gold and were now oiled bronze.

    Lamps Update with Rustoleum Oiled Bronze Spray Paint - The DIY Girl

    I’m in the process of painting my living room tables. The one above is the last one I have yet to do. I painted the ceramic knobs I had on the 3 tables with this paint and I will have to see if it sticks. I sanded the knobs before painting, but didn’t feel like I put much of a dent in the ceramic surface.

    Lamps Update with Rustoleum Oiled Bronze Spray Paint - The DIY GirlI have decided to try it on a switch plate to see how that holds up. It’s the switch by the door to the garage and gets finger prints so maybe this will hide the marks.

    The spray can that sprays in all directs, even upside down, was great for getting all the nooks and crannies on the lamps. Huge improvement in the lamps and all it cost was a $5.77 can of paint from Walmart.

  • Fruit container as storage basket

    Fruit container as storage basket

    I love to re-purpose things and when I found myself getting annoyed every time I wanted to make a cut on my compound miter saw because I couldn’t remember where I had set my safety glasses down or put the pencil I decided I needed a solution.

    I eat strawberries all the time so I grabbed a recently emptied clear basket and cut the top off. There were openings near the top where a cable tie could be threaded through so I made a couple of more holes about half way down the container.

    Two cables ties and it was firmly attached to the table and I now always know where my glasses are! Since it has a lot of ventilation holes it’s even easy to blow the saw dust out of it.

    Fruit container as storage basket - The DIY Girl

  • DIY framed chalkboard from MDF

    DIY framed chalkboard from MDF

    I had a bare wall that needed something and also had a bug to have a chalkboard for jotting grocery lists and to do ideas. Combine those two wishes with left over materials.

    I figured the chalkboard framing that worked so well for my Shaker kitchen cabinet update would work for this — I had left over 3″ strips and two larger pieces of MDF. I took one of the pieces to Lowe’s and asked if they would cut it for me — they reluctantly did. I need to get a table saw as soon as a move to a more permanent location…

    I painted the large piece with the leftover chalkboard paint from the backsplash, cut MDF strips to fit the sides and then join them on the top and bottom. I decided to get at least one coat of paint on the black border strips, so I did have to buy a can of black spray paint.

    I glued the MDF strips to the back using Liquid Nails.

    DIY framed chalkboard from MDF - The DIY Girl
    Spray paints sides glue with liquid nails
    DIY framed chalkboard from MDF - The DIY Girl
    Top and bottom pieces glued
    DIY framed chalkboard from MDF - The DIY Girl
    Framed glued and sanded and ready for last coat of paint

    I very carefully taped the chalkboard and covered with newspaper so I could spray the frame again — making sure to cover the exposed edge of the bottom board.

    I hung the chalkboard and it needed a little something — it was too plain. So I printed an enlarged border, transferred it to the chalkboard by using a crayon on the back of the my printout and then tracing. I am not a detail painter at all — then I painted in the border accent with black acrylic paint. I can’t believe how much I like having a chalkboard in the kitchen to jot things down and it was free since I used all leftover materials.

    DIY framed chalkboard from MDF - The DIY Girl


  • Rounded corners for fleece blanket

    Rounded corners for fleece blanket

    This is just a short post. If you crochet fleece blankets and have only done 90 degree corners, you should try rounded corners. Also, if you crochet fleece blankets you should look into joining or contributing to Project Linus since there are chapters all over the US.

    I learned this from a woman in the Dallas chapter of Project Linus — round the corners so you just cruise around them when crocheting the border on a fleece blanket. She was so good at it she could do it free hand — I’m not so good, so I made a template using a dinner plate since it’s a good curve for the corner. Anything smaller makes the corners too tight.

    Rounded corners for fleece blanket - The DIY Girl
    Cutting and pinning 2 layer fleece blanket with rounded corners

    The border isn’t finished, but it gives you and idea of how it looks when crocheted. On this blanket I added 4 stitches in each corner when I jumped to the larger crochet stitch so the border wouldn’t be tight and cup at the corners.

    Rounded corners for fleece blanket - The DIY Girl

    Once I tried the rounded corners I never want to go back to 90 degree corners again.

  • Aging wood with tea, vinegar and steel wool

    Aging wood with tea, vinegar and steel wool

    I recently read a post explaining the chemistry behind this process — how the tannin of the tea would combine with the oxidation of vinegar/steel wool mixture and provide an aging stain for new wood. I was doubtful. Since the ingredients were all on hand and economical I decided to run a test to see if it would do anything.

    Brewing the mixtures

    I made a small amount of tea with 4 tea bags and let them steep for a couple of hours. I got a small chunk of 0000 steel wool and dropped it in about 1/2 of apple cider vinegar. Both apple cider and white vinegar can be used — I just decided to try apple cider first. I left the lid off the jar, but the vinegar was evaporating so I sealed the jar and set both jars aside for a week or so — hence the mold you see in the tea jar. I just avoided those lumps and didn’t think they’d affect the staining or lack of. Notice the color of the popsicle stick? It’s from stirring the vinegar solution.

    Aging wood with tea, vinegar and steel wool - The DIY Girl

     A few days before I had slopped both mixtures on a small piece of 2×4 expecting nothing. I walked by a couple hours later and stopped dead in my tracks saying “No way!” The smooth sides were dark brown and the rough ends were almost black. I decided it was time for a more serious test. That first test piece is in the top right corner of the rest of the pictures.

    Wood before staining – 2 x 4 and pine board

    Aging wood with tea, vinegar and steel wool - The DIY Girl

     Very light coat of tea applied with foam brush – can’t even see the tea

    Aging wood with tea, vinegar and steel wool - The DIY Girl

     Vinegar solution applied very lightly with a foam brush (immediately after application)

    Aging wood with tea, vinegar and steel wool - The DIY Girl

     After drying a couple hours

    Aging wood with tea, vinegar and steel wool - The DIY Girl

    I can’t believe how much it stains. Both the tea and vinegar were barely wiped on, but the 2 x 4 in the upper left is almost black. I wanted to see if there would be a difference between just vinegar and vinegar applied over tea and there is a big difference. The tea does act with the vinegar to make it darken a lot more.

    I want to make another toolbox so I may use this stuff as a test on that. Be warned about this vinegar/steel wool solution. It may just be vinegar but it’s a serious stain. I got it on a Formica clad board and it won’t come off, so if you use it show the same care you would with any stain.

  • Kitchen Update Final

    Kitchen Update Final

    Kitchen Update Final - The DIY Girl

    Problem List (starting at the top and working down):

    1. popcorn ceilings – I decided to leave the popcorn for someone else to scrape
    2. cheap, cheap, cheap gold paint – I’ve complained about the paint in multiple posts. Glad it’s gone.
    3. ancient light fixture – moved a pendant light from living room. Pendant light in center of living room???
    4. ugly brass ceiling fan – I spray paint brushed nickel with black blades
    5. popcorn on soffit – scraped, primed, and painted like walls
    6. old-fashioned trim board over sink – removed (and I don’t miss it…)
    7. cheap plug in flourescent light over sink (so not code) – switched light wired in by electrician
    8. gap between cabinets and soffit – corrected with trim
    9. no window covering over sink or on sliding glass door – I made a Roman shade from fabric I had. Made curtain from canvas drop cloth for $15
    10. old-fashioned routed cabinet style – Shaker Cabinet Update detailed in multiple posts
    11. horrid green paint (on door face only – backs were dark wood) – painting cabinets detailed in multiple posts
    12. gold paint on backsplash area – primed, painted with chalkboard paint, decals applied
    13. ugly Formica counter tops – painted with Giani Granite Countertop Paint
    14. chair rail around room (sorry — I don’t like it in a kitchen…) – removed and wall patched
    15. gap above and sides of dishwasher – dishwasher raised and wood time added to side
    16. black painted kick plate below cabinets – painted with several coats of white
    17. vinyl flooring – when I had the dishwasher out to clean it I saw carpet under the vinyl. Someone else can deal with ripping all that out. I pass.

    Everything got done but #1 and #16 — popcorn ceiling and vinyl floor with indoor/outdoor carpet under it were more than I chose to tackle. I would have liked to replace the railing along the opening for the stair with a solid wall, but decided to forgo the expense. There are posts galore for everything I did.

    Here’s what it cost me. I am amazed what I could accomplish for under a thousand dollars.

    Kitchen Update Final - The DIY Girl

    Before

    Kitchen Update Final - The DIY GirlKitchen Update Final - The DIY Girl Kitchen Update Final - The DIY Girl

    I moved the white refrigerator to the garage and it will sell with the house when the time comes. In the meantime I wanted to use my own refrigerator.

    After

    Here’s a picture with all the furniture out of the room so it shows the cabinets well.

    Kitchen Update Final - The DIY Girl

    Here’s the kitchen with the island and rugs I added. I got the set of three rugs from Walmart for $33. The dogs like rugs, or rather they hate hard floors, so I wanted plenty of rugs for them.

    Kitchen Update Final - The DIY Girl

    Picture taken from the sliding glass door so you can see the chalkboard and plaques I made.

    Kitchen Update Final - The DIY Girl

    This shows the painted ceiling fan and the curtain I made for the slider. The curtain rod is 1″ conduit pipe since I wanted something strong enough it would not need a center bracket. The rod cost $10.

    Kitchen Update Final - The DIY Girl

    Picture that shows the backsplash behind the stove.

    Kitchen Update Final - The DIY Girl

     Odds and Ends

    Nikki was grossly offended she was banished from the kitchen while I took pictures.

    Kitchen Update Final - The DIY Girl

    While painting I ran across a couple wall anchors that were still in the wall. I kept painting and was wondering what they had been for when it hit me. Holy crap! I don’t have a smoke detector! I ordered a smoke detector and a new doorbell from Amazon — the old, big, brown, ugly doorbell had to go.

    Kitchen Update Final - The DIY Girl

    The wall over the microwave looked barren. I didn’t want to spend any money so I used scrap lumber, printed vintage labels off the internet and mod podged them on the wood.

    Kitchen Update Final - The DIY Girl

     I made this on the computer and had it printed. I like what it says 🙂

    Kitchen Update Final - The DIY Girl


  • Building a toolbox

    Building a toolbox

    I wanted something made out of wood for the shelf on my new kitchen island so I found a box I liked on Houzz in their ideabooks — simple plan and materials.

    I purchased a 1″ x 6″ x 8′ board and a dowel. Cutting the end corners provided nice little scraps for propping up things when I’m painting them. I had a 1″ paddle bit for the holes. I also bought 3′ of heavy sisal rope thinking that might make a cool handle if I could knot it.
    Building a toolbox - The DIY Girl
    Assembled box and testing rope — I love how the rope looks!

    I wanted the wood to end up looking like barn siding and wasn’t quite sure how to get there. I wanted to see what burning would do, so I tried that first.

    Building a toolbox - The DIY Girl
    Burned with propane torch

    Next, I beat the crap out of it with a hammer and assorted metal pieces like bolts, screw, etc. Seems a little weird to lovingly and carefully build something and then burn and beat it up.

    I thinned white primer with water and white-washed the box so the white would be in the distressing I had added.
    Building a toolbox - The DIY GirlWhen it dried it not only was lighter than I wanted, but it had a pinkish tint to it that had to go. I ended up getting some very dark stain called Kona by Rustoleum since I figured the white wash would make stain slow to penetrate. I finally got a look I was happy with so I added the rope to see how it would look.

    Building a toolbox - The DIY GirlI got some vintage labels I found on the internet and glued them to the ends. I used a paste wax to finish the entire box. Here’s the final pics of the toolbox. Burning the wood made the sap boil out of the knots and they didn’t take stain — I like the golden brown the sap added to the textures.

    Building a toolbox - The DIY Girl Building a toolbox - The DIY Girl Building a toolbox - The DIY Girl