Author: TheDIYGirl

  • Gray weathered wood finish – success at last

    Gray weathered wood finish – success at last

    Best Weathered Gray Stain - The DIY Girl

    My end goal with my house is to covert over to a beach themed cottage decor so I would love to have some pieces with a gray weathered wood finish. Most of the stuff I will be staining to look like weathered wood will be pine so I have been testing various solutions.

    Helpful videos

    For those of us considering a solution of vinegar and steel wool to stain wood there are a couple of videos I would recommend to learn about the process. Rundown – Ebonizing Wood Follow Up explains what iron acetate — the result of steeping steel wool in vinegar — does and how it looks on different woods. He also explains how to enhance it with a tea solution.

    The other video I suspect is by the folks at DIY Driftwood although they don’t fess up to that during the video. It goes through trying to get a weather wood finish using 5 different techniques on different woods.

    My testing

    The last time I tried vinegar and steel wool I let it steep for a week and it turned pine almost black. I want a GRAY weathered wood finish so I wanted to see what would happen if I let it steep for a much shorter length of time. I tried it after 2 hours, 4 hours, 6 hours and it gave me brown, darker brown, reddish-brown. I added a whole lot of white vinegar and it was still brown. I diluted it more and got brown.

    vinegar-steel-wool-stainI let the solution site 1 weeks, 2 weeks, 3 weeks. No matter what solution I used of steel wool and vinegar I get anything from brown to reddish-brown on pine. This solution doesn’t give an aged look on pine in my opinion. May work great on oak, but I’m not building things in oak.

    That’s why I found the videos above — I wanted to understand what steel wool and vinegar do chemically and that the tannins in tea increase the effect for ebonizing or turning wood black.

    Some tips on steel wool and vinegar

    • make sure you have real steel wool — apparently there is fake stuff
    • wash steel wool to remove oil that protects from rust
    • do test on the same wood you will be staining using a scrap piece

    Weathered gray finish

    Back to the drawing board to figure out how to get gray. I was hoping to go directly to gray and not have to stain it dark and then use white wash or liming wax to lighten it.

    I wouldn’t mind trying the driftwood finish at DIYDriftwood.com, but $5.80 shipping for 2 little packets that cost $14.99??? I tried emailing and asking if they could send the packets in a USPS first class envelope but they said the packets couldn’t be sent air. They were so resistant to the idea I didn’t tell them that USPS first class goes by truck. Guess they want their shipping fees.

    I tried a couple small cans of gray stain and I felt they went on like paint.

    classic-gray-271
    Courtesy of the Minwax website

    I finally tracked down a can of Minwax Wood Finish Classic Gray 271. The lady at Home Depot said it’s a relatively new color for Minwax and they didn’t have it in the little cans yet so I ended up with a quart. I did a test on a piece of pine and loved how it looked.

    I used it as a test on an ottoman tray I made and I’m so happy with how it looks. It is a weathered gray with some of the lighter grain showing through the stain – not solid coverage at all. I love the grays and browns — that’s exactly what I was aiming for. This is an oil stain — be sure to thoroughly stir it before applying.

    This is how the tray looked after applying 2 coats of stain.

    tray-after-stain


  • How to fix a sliding toilet seat

    How to fix a sliding toilet seat

    Brand new house and brand new toilets and the seats wouldn’t stay in place! It was driving me insane. With the total craziness of moving and unpacking and you can’t even have a calm respite when you go to the bathroom that’s free of problems so it was time for a little toilet repair.

    I figured out the problem was the bolts were smaller than the holes in the toilet, so even though they were tight they were able to slide around inside the holes.

    Enter the Ginsey Toilet Seat Tool kit available on Amazon and even a little more cheaply at Lowes.

    The kit consists of a tool for holding the bottom nut in place and 6 washers. The washers shown here are black, but the kit I purchased at Lowes can with white ones. I think white is better… unless you happen to have black toilets. The only other thing you need is a screwdriver.

    The washers fill the holes so the bolts have nowhere to move. I’m not sure the tool is completely necessary — a package of the washers would have been just fine. I guess it did make it easier to hold the nut on the bottom while I tightened the bolts from the top.

    How to fixing a sliding toilet seat - TheDIYGirl.com
    Using tool to hold the nut (not sure it’s really necessary)

    For some reason no matter what I tried the seat still doesn’t sit perfectly center on the toilet, but I guess that’s a problem for another day. At least it doesn’t slide all over the place anymore.

    Economical kit, easy fix, and corrects three toilets. What more can you ask for except just maybe having the seats properly installed when you buy the house? Ah, but that would be too easy.

  • Tips for ceiling fan installation

    Tips for ceiling fan installation

    Having just installed 5, count them 5 (house came with no fans) ceiling fans since moving in, I have some pointers for newbies that will make the process a little easier. Ceiling fan installation isn’t bad, even when doing it alone. Some of this information comes by way of learning from my past mistakes…

    Tips for installing ceiling fans - TheDIYGirl.comKnow the support you’re installing into: If your outlet isn’t a braced outlet do not trust it. My builder said all ceiling lights were braced to hold fans, even the light on the outside covered patio. I’m not thrilled that I have to go on trust and would like to see it — just not bad enough to climb into an attic in summer in Florida.

    If in doubt, remove the existing box and install one of the supports pictured right — they’re available at all big box home improvement stores. It’s easy and a whole lot better than having a fan crash down unexpectedly. I once had a fan I had not installed spontaneously crash down on the bed in a spare bedroom as I watched. The fan wasn’t running and I hadn’t touched it. Fortunately no one was injured, but the event left a lasting impression.

    Always, always turn the power off at the circuit breaker: Never work on electricity with just the wall switch off — be safe and turn the breaker for the circuit off until installation is complete.

    Unpack all the parts: more than once I have had missing parts or a broken globe for the light. It is really annoying when you are part way through the install and are stopped dead with this kind of problem. FYI – Before I got smart enough to check all parts in advance I refused to take the fan back but instead returned with my receipt and made the store open a box and replace my missing/broken parts.

    Really read the directions: All fans seem to go together a little differently. Read the instructions that come with them. It will avoid a lot of headaches.

    Strip the wires on the floor: Before hefting the fan motor into place strip a little additional insulation off the wires. They come with maybe 3/8″ exposed and I like more exposed wire to guarantee a good connection with the wires coming out of the fixture box. Just make sure it’s not so much you have exposed wire showing above the wire nuts when connected. It is so much easier to do with the motor sitting on the floor than when it’s hanging from the ceiling.

    Use the correct size wire nuts for your connections and make sure they are tight. Here’s a video if you’re new to it.

    https://www.youtube.com/watch?v=bCbp6oVav7E

    Assemble fan blades per instructions: This is important since you want a balanced fan that doesn’t wobble. Another thing that seems to vary a little between fans.

    Make sure all assemblies are tight: Unless you like rattling noises from your fan be sure to get everything installed with appropriately tight connections.

    Test sooner, rather than later: As soon as the motor is up and the light kit installed I stick the bulb in temporarily, turn the power on for a moment, and test to make sure the motor turns and the light bulb comes on. Turn the power back off until you’re completely done. I believe somewhere in my sordid past I have completely finished and put everything away only to discover something didn’t work properly…


  • Improving pantry shelving

    Improving pantry shelving

    I moved into a home with a decent size pantry, but it only had three 12” deep wire shelves. While I find them tolerable in clothes closets, I don’t like the way everything falls over on wire shelves in a pantry. It was really a pitiful use of space that wasn’t going to work for me and I wanted to improve the pantry shelving BEFORE I started unloading boxes.

    Improving pantry shelves - TheDIYGirl.com
    My sad looking 3 wire shelves in the pantry


    I went to Home Depot and purchased four tracks and shelf clips which are technically called pilaster standards and supports. I also bought a 4’ x 8’ sheet ¾” MDF. I had the nice guys in the lumber department cut the board into 16” strips and then 5 shelves cut to 35 1/2” to maximize the use of the space. Be sure to have your boards cut at least 1/8″ shorter than the space between the tracks to allow for angling the boards into place.

    pilaster-supports
    Support for shelf
    pilaster-standards
    Standard

    The only tricky part about installing the standards is the need to get all four of them level so your shelves will be level. I secured each track with 5 hollow wall anchors.

    Once the tracks are installed you insert the clips that hold the shelves and drop your shelves in place and load the shelves.

    Improving pantry shelves - TheDIYGirl.com

    I needed space at the bottom for the dog food and dog biscuit containers so I could only fit in 5 shelves.  You can see on the floor I also had room for a container for recyclables. Between the added depth of the pantry shelving (going from 12″ to 16″) and the additional shelves (going from 3 shelves to 5 shelves) the pantry now holds an enormous amount. And if I buy some now appliance or something else that is tall, I can easily adjust a shelf up or down to accommodate it.

    At some point when I have more time I want to touch up the wall paint from removing the wire shelves, paint the MDF shelves white, and do a better job with the shelf liner, but that is farther down the priority list.

    Improving pantry shelves - TheDIYGirl.com

    I went from 1296 square inches of shelf space to 2880 square inches. The sheet of MDF was around $38 and I have boards left over to use on other projects. The standards and supports ran about $20. HUGE improvement over 3 wire pantry shelving and all for less than $60.

    I re-purposed the 3 wire shelves in the pantry and they are now in the master closet so nothing went to waste.


  • Best way to clean stainless steel appliances (and keep them clean)

    Best way to clean stainless steel appliances (and keep them clean)

    Let’s get this up front – I am not sponsored in any way by Pledge or SC Johnson. This is a totally unbiased user review by someone who stumbled onto great advice.

    I could not keep the stainless appliances looking good

    The house I moved into came with new GE appliances. While the French door refrigerator is really pretty, the noise from it is enough to drive me insane so I called GE to have it checked out.

    I thought my stainless steel appliances looked terrible. A neighbor had told me a repairman said to use WD40 – I thought that was a gross idea, tried it on a spot and didn’t like the result. I read a blog that suggested all you needed to have gleaming stainless was water and a microfiber cloth. Maybe so, but that method was extremely work intensive and didn’t last 5 minutes. I tried stainless steel cleaners and the appliances still didn’t look nice. It annoyed me every time I walked in the kitchen. I wanted to know how to clean stainless steel appliances!

    Anyway — I asked the GE repairman if he had any suggestions for cleaning them. Oh boy, did he.

    Pledge on stainless

    He asked if I had a can of Pledge. I did. He told me he’d do the right side door of the refrigerator. These were his recommendations for cleaning all your stainless steel appliances. This includes refrigerators, stoves, dishwashers, microwaves, coffee makers, etc. If it has stainless put Pledge on it.

    Best way to clean stainless - TheDIYGirl.com

    1. I suggest you run your hand over the surface of the appliance before so you know how stainless steel feels without Pledge.
    2. For appliances with a large amount of stainless and no glass (refrigerators and dishwashers) put towels down on the floor to protect it from spray. I learned this the hard way when I oversprayed Pledge on hardwood at my previous house and both me and the dogs would almost slip and fall every time we walked on that spot.
    3. For smaller appliances and appliances with glass, spray a heavy coating of Pledge on a cloth and apply to the stainless. The other option is to spray Pledge directly on the appliance and spend some time cleaning the Pledge off the glass. I applied it to a cloth.
    4. For large appliances: spray Pledge on heavily and swirl it around really getting into the stainless. Allow it to sit for a few minutes to soak in. You don’t need to worry about the grain of the stainless. He suggested wiping it heavily in circles so that it really gets into the surface.
    5. Use an old t-shirt to thoroughly remove the heavy coating of Pledge. Again, don’t worry about the grain of the stainless and wipe in circles, changing to clean areas of the cloth until all the Pledge is removed.
    6. Now run your hand over the stainless. It feels like satin. It’s wonderful.
    Best way to clean stainless - TheDIYGirl.com
    Left door coated with Pledge

    After doing this to my refrigerator it was absolutely gorgeous. Best part is that it takes minor touch-ups once a week with Pledge to clean up the splatters from the ice maker/water dispenser in the door and the messy fingerprints on the handles. I live alone and am the only person who cooks in my kitchen – I can’t figure out what idiot keeps grabbing the refrigerator door handles with slop all over their fingers…

    Best way to clean stainless - TheDIYGirl.com Best way to clean stainless - TheDIYGirl.com

    Pledge on Corian

    The GE guy said Pledge is also great on Corian and did a small area. I have since Pledged the living daylights out of the countertops in the kitchen and both bathes. You really have to feel the surface before and after. There is a rough drag when you pull your fingers across the surface before. When you coat them with Pledge everything slides effortlessly across the surface.

    Corian will need to be re-coated more often since you’re constantly wiping your counters down, but it even makes that easier since stuff seems to stay on top of the Pledge. I went hog-wild and did the entire kitchen and both bathrooms. The Corian looks awesome.

    Best way to clean stainless - TheDIYGirl.com

    I am SO glad I asked the GE repairman the question and really appreciate his information.

    Follow up: I’ve been using Pledge to clean my stainless steel appliances for over a month and I’m amazed how clean they are staying and how easy the once a week touch up is to keep them looking great. If my water/ice dispenser on the refrigerator didn’t splatter so much my fridge would look perfect all the time.


  • DIY shelves for garage storage

    DIY shelves for garage storage

    After moving I was desperately in need of storage space in the garage (I basically went from a 4 car garage to a small 2 car garage – talk about downsizing) and after researching I decided to design something similar to the shelves on DIY Design Fanatic with some minor modifications. Another site suggested moving the legs in at least 5” from ends to prevent sagging in the middle of the shelves, at the last-minute I decided to add center supports under each shelf. Other than that, DIY Design Fanatic had a perfect plan. Below is my finished DIY garage storage shelves.

    DIY shelves for garage storage - TheDIYGirl.comScrews vs. Nails

    3ab19e13-6ee8-4af0-98bf-f29101fb3f2a_400Using a nail gun would have been quicker, but it would have been a forever kind of assembly. I opted for screws so shelves could be adjusted up and down or the entire shelf disassembled if needed.

    I secured the shelf frames with 3” screws and attached the OBX to the frame with 1 ¼” screws. The shelves were also attached to the legs with 3” screws. I am not good with a drill and screws and opted for the more expensive self-tapping screws that went into the wood beautifully and I was able to complete the entire shelf unit without stripping one screw and with very little cussing and swearing.

    My advice: spend the extra money and get the good screws. They are #9 star flat-head deck screws available at both Lowe’s and Home Depot and each box includes the bit for driving the screws.

    Design

    I drew up the design and according to my measurements the shelf unit (one row of containers on the floor and 3 shelves for containers) should hold 22-23 plastic containers. I wanted the bottom shelf to leave 23 ½” for larger containers on the floor. The other 2 shelves would leave 20 ½” and the top shelf would sit at 75”. The garage ceiling is about 102” so that shelf would have about 27” of space.

    My only dilemma was how to assemble. Not one site detailed the assembly process.

    Materials

    I purchased everything at Home Depot and it cost me less than $80. I had them cut the sheets of OBX for me. I don’t have a table saw and have a small SUV — that way I could haul all the materials home.

    Qty Description
    12 2 x 4’s
    2 sheets of 7/16th OBX ripped in half lengthwise
    1 box 1 ¼” self-tapping star deck screws
    1 box 3” self-tapping star deck screws

    DIY shelves for garage storage - TheDIYGirl.comAssemble the shelves

    As I cut 4 24” pieces of 2 x 4 for the ends of each shelf I ran into a surprise. I had purchased the cheapest 2 x 4’s and wasn’t aware they are not a full 8’ long – they are a nominal 93″ compared to 96″ . The width of the end pieces was 3” and my shorter 2 x 4’s left me a little short for the OBX. It was less than a ½” so I decided to live with it instead of loading up 11 boards and returning them to the store. The OBX is just a little longer than the frames and it doesn’t bother me one little bit. If I would have purchased 8′ 2 x 4’s I would have needed to cut each to fit under the OBX.

    As mentioned above, I was a little worried about the weight on the shelves so I added center supports to prevent the OBX from sagging. Easier to do it now than wish I would have done it later.

    DIY shelves for garage storage - TheDIYGirl.comDIY shelves for garage storage - TheDIYGirl.comAdding the legs

    I cut the leg pieces to 75”, the height of the tallest shelf. I then turned one of the shelves upside down on the floor to attach the 4 legs. I used a square and a level to make sure they were straight before screwing them in.

    DIY shelves for garage storage - TheDIYGirl.comNow the tricky part – how to assemble it the rest of the way by myself. The only way I could think was on its side. I rolled it over with the top shelf away from the wall I wanted the shelving unit to be against since it seemed like that would be the easiest way to lift it into place when it was done.

    Adding shelves 2 and 3

    I put shelves 2 and 3 on their sides and slid them in between the legs. I measured the living daylights out of it to make sure the top of the shelf second from the top was at 51” on the legs and 5” in from the ends of the shelf. Note: I realized I had the shelf turned the wrong way and removed the shelves, put the top away from the wall, and then repositioned the shelves.

    DIY shelves for garage storage - TheDIYGirl.comSame for the last shelf. I measured to make sure all 4 legs were attached with the top of the shelf at 27” and 5″ in on each end.

    I basically had it lying on its front side. I put the screws in the back legs and screwing into the frame. For the front of the shelf the screws went into the shelf frame and then through the legs. I used 3 screws to attach all 3 shelves to all 4 legs. It was a lot of screws, but the shelf was going to hold a lot of weight.

    DIY shelves for garage storage - TheDIYGirl.com DIY shelves for garage storage - TheDIYGirl.comErecting

    Now the funny part. It dawned on my that I had built really great garage shelves all by myself and had absolutely no chance of setting it up and positioning it on my own. I had mentally started referring to the project as “the beast” because it was.

    The weight of each individual shelf was heavy. All three shelves assembled with legs  was really, really heavy. I tried to lift the top edge. There was no way that was happening so I called a friend and had to wait for assistance. It was even heavy for the two of us to heave up into place.

    DIY shelves for garage storage - TheDIYGirl.comDIY shelves for garage storage - TheDIYGirl.comDIY shelves for garage storage - TheDIYGirl.comI’m still in shock how much the thing holds. I have ladders against the one end and screwed in coat hooks on the other to hang shoes on to keep them off the floor.

    And yes, my containers are labeled. I’ve already had people laugh about that, but at least I know what’s in each and every container.

    This whole project cost under $80 and took an afternoon. It’s a total bargain when you consider how much storage it provides. And if I move I can take my DIY garage storage shelves apart and take them with me.

  • My builders grade house before pictures

    My builders grade house before pictures

    I moved to northeast Florida to a new construction home. Big change from the foreclosure fixer upper I came from, but not any less work. I went into this knowing it’s not a perfect house. It’s seriously lacking in storage – of any kind. I’m going to be on a mission to utilize every square inch of useable space since I’m downsizing big time.

    The house is also builders grade, builders grade, builders grade. I’m not knocking it – it provided me a home in the price range I could afford – but sometimes builders grade isn’t great quality and it tends to be kind of boring and lacking in pizzazz. The house is pretty plain and badly in need of some personality.

    I spent 9 hours driving here and immediately hit the house with my camera to catalog what it looked like starting out without furniture, without anything — well my dog Ellie and a backpack.

    So this is my starting point gallery. Not really of any use to anyone other than myself. I want to see where I started so I can compare to where I end up.

    [pile_gallery id=’2787′]

    Hitting the ground running

    The morning after I arrived, and before the moving truck was to arrive I got up and painted the garage. One of the cost cutting measures for my home apparently was not painting the garage. I wanted it painted. I would never have the opportunity again to paint an empty garage. I took it.

    As soon as the garage was painted I went to Home Depot, the closest big box store, and purchased a 4’ x 8’ sheet ¾” MDF and had them cut shelves for the kitchen pantry. Three wire shelves were pitiful.

    Next up was doing something with the master closet since it had wire shelves that were so high I couldn’t touch them. Apparently they were installed for an NBA player.

    More on both of these projects later.

    Now here the starting point gallery.

  • Pretty clothes and power tools

    Pretty clothes and power tools

    Just a quick post. My new favorite DIY picture 🙂 Not sure which I like more, the picture or the caption.

    The DIY Girl
    Pretty clothes and power tools. They’re all a girl really needs.

    Source: Short Leash by Kelly Reemtsen


  • Cloning a failing operating system hard drive

    Cloning a failing operating system hard drive

    This is not a how-to. No pictures. This is rather the tale of a fairly proficient user who isn’t afraid to beat her way through computer problems. The key to success is that most people have more than one computer in the home these days, so if you get stuck you just use the other computer to research until you find the answer. FYI – the computer is a Windows 7 desktop.

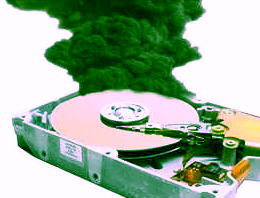
    I’ve known for a while my hard drive was failing. I started getting the dreaded BSOD (blue screen of death) and the system would shut down and restart. I researched the information I got from WhoCrashed  (Microsoft’s crash info is useless) and was not able to fix it no matter what I tried.

    It was suggested on some forum’s discussing my particular error to do some tests. I did a checkdisk that took two days for my 640 GB drive and found bad sectors. I used memtest to check the memory and it was fine. I downloaded the diagnostics from Western Digital and it told me there was enough damage to the drive that it should be replaced.

    So now I had confirmed what I already knew.

    I’d been putting this off because I was sure it involved installing Windows on a new formatted drive and then each and every one of my many, many programs. It would take me days. I’m sort of a power user.

    Putting off addressing a failing hard drive is fairly suicidal if all your data resides on the drive without backup. If that is your situation, get a new hard drive as soon as you suspect the problem. Or play Russian roulette with all your data. Your choice.

    Since the operating system drive is the most heavily used drive and most likely to fail I had gone to a multi-disk system several years ago. All my data resides on other hard drives and is duplicated on even other drives so if one craters on me I have another place to go for the files.

    I love cloud storage, but I have gone completely digital. All my music, all my movies, all my photos( I even scanned every single paper photo I had), much less all my documents and worksheets add up to a ton of data so I have several hard drives to hold the originals and backups. Really important things are on three different drives. The one exception is my movies – I recently had the drive that held my movie files fail and was able to get it to last long enough to copy it all to a new drive. See my post Hard Disk Drive Failure – what to do.

    A great alternative

    Then I stumbled across imaging or cloning the drive. Wow – what a concept. Copy the drive to a new drive and have it functional with the operating system, all existing programs, even all the data on the drive. Cool! I was in.

    After more research I decided to go with a free program called Clonezilla. My computer has a raid system with hot-swappable drives. For the uninitiated, that means I can pull out and replace drives without shutting down the computer (all except the operating drive). It’s wonderful. What it also means is it would be easy for me to put the new drive in one of the hot-swappable spots and copy from the operating system drive.

    I need to warn you this process isn’t for the faint of heart. Unless you’re very knowledgeable or of the mindset that you will beat something into submission if that’s what it takes, you might not want to try this. I fall into the latter group.

    The method

    Or lack thereof. I really stumbled my way through this.

    I put in the new drive and went to disk management under administrative tools. It had the new drive and I box popped up asking if I wanted to add a boot sector, so I let that process. I had read “Disk cloning software may not be aware of the hidden partition and as a result only clone the Windows 7 partition, leaving you with an unbootable hard drive” so I wanted to make sure that boot sector was there.

    I removed all the other hard drives so I was down to the two I needed.

    I had already downloaded and created a bootable USB drive containing Clonezilla while I was waiting for the hard drive to arrive from Amazon. By the way — I got a 1 TB Seagate drive for $59.99.

    There are numerous blogs and youtube videos on how to use Clonezilla. These are some I looked at:

    https://www.youtube.com/watch?v=YzxL95GmmYk

    http://lifehacker.com/5517688/how-to-upgrade-your-tiny-hard-drive-to-a-spacious-new-one-and-keep-your-data-intact

    http://arga.wordpress.com/2010/04/24/how-to-properly-clone-a-windows-7-system-partition-with-clonezilla/

    They directed me how to get Clonezilla going. I started cloning the image to the new drive. It didn’t get very far until it bailed out telling me there were bad sectors on the drive and couldn’t go any further and mentioned I could use “rescue”. Didn’t tell me how to do that, but mentioned that I could. The adventure begins.

    Expert mode in Clonezilla

    It was easy to get into the expert mode. It was not easy to figure out how to use it. I tried repeatedly to select “rescue” but there were no directions on the screen and if I hit enter it went on to the next screen with no “back” option so I would have to reboot and try again. And again. Argggg.

    I finally found this PDF on using expert mode ftp://ftp.itb.ac.id/pub/Clonezilla/clonezilla_live_doc/QuickReference_Card_0.9.5/ClonezillaLiveRefCard_EN_folding_0.9.5.pdf and it mentioned you use the damn space bar to select options. How the hell would I have ever known that? I was getting a little testy at that point.

    I also selected “Check and repair source filesystem before cloning” but I need to make it clear — I had absolutely no idea what I was doing. It just sounded like a good idea.

    Rescue mode

    The rescue found many bad sectors that it couldn’t copy. So many in fact, I was beginning to wonder if I would have trash on the new drive. Then I looked up that a sector is 512 bytes. I did the math and found out that 640 GB drive had roughly 1.23 billion sectors. I was less worried.

    The copy took a surprisingly short amount of time. Definitely less than an hour. The new drive contained the exact same stuff as the old drive.

    It wasn’t over yet

    I pulled the old operating system drive and installed the new one like I had it all figured out. Wrong. No matter what I did I couldn’t get the computer to book. I put the old operating system drive back in. I got into windows and went into disk management and it told me there was a conflict so the new drive was inactive. More research with no good answer so I made it active. What the heck.

    I pulled the old operating system drive again and tried booting from the new drive. I may have booted that poor computer 20-30 times today.

    I was asked for the Windows repair disk since it couldn’t boot. It tried to do a repair and failed. I tried booting again several times. Finally it asked for the original Windows disk. I put that in, it ran for a while and the computer booted from the new drive. Go figure.

    Final detail

    After I properly installed the new hard drive and reassembled the computer I booted it up and found one more issue. When looking at it in disk management there was about 350 GB of unallocated space. How they heck do you fix that.

    More research and forums suggested easeus partition manager to fix partition issues. That piece of crap installed a bunch of malware. Goody — more computer issues to resolve.

    I got back into disk management, right clicked on the allocated part of the drive and merge was one of the options. I clicked it and the unallocated part was brought into the allocated part. Woohoo. That was easy. Well, except for the easus mess I had to clean up.

    How long?

    Believe it or not I started at 10:00 AM and was up and running at 1:30 PM. Three and a half hours. I doubt I would have had Windows 7 installed in that amount on time, much less the task of re-installing all my programs.

    Malware cleanup


    The 3.5 hours doesn’t include cleaning up the malware though. Later I used ADW Cleaner, Junk Removal Tool, and Rkill that I got from Bleeping Computer. Great cleaner programs. It didn’t take long to get rid of it.

    I swear if I get the stupid conduit search protect crap installed one more time I’m going to go after someone with a bazooka. I couldn’t believe even a download from CNET included that, so I won’t use them anymore. Here’s a wiki on what to do if you have it http://www.wikihow.com/Remove-Conduit-Search-Protect.

    What do I think of cloning?

    One of the first posts I read said that cloning wouldn’t create a boot sector. Maybe some cloning programs don’t, but Clonezilla does. The whole process was really incredibly easy. There are always extraneous issues to deal with when you do this sort of thing, so I don’t feel what I had to figure out was that bad. Not compared to re-installing lots and lots of programs.

    I’ve tried quite a few programs and so far all are running really well. If I encounter problems down the line I will post an update.

    The nice thing – I shouldn’t have to worry about this for a long time.


  • Restoring auto trim

    Restoring auto trim

    Sheesh — I’ve been so bored waiting between house showings that I’ve worked on all sorts of weird projects that were easy to quickly put away. Here’s another one.

    I have a 2006 Xterra. I love my little SUV and plan to drive it until it drops. I bought it used in 2008 and it has been a trooper requiring very little in the way of repairs. The fuel gauge sensor died around 50,000 miles, a known failure, and that’s been about it except for normal maintenance.

    Plastic trim

    While I love the vehicle I have not been happy with how the plastic trim looks on it. The worst is the plastic running along the base of the windshield where the wipers mount. It was almost bleached white. The rear bumper, that gets a lot of abuse from the dogs, looks bad. There are steps toward the back on each side that were faded. The door handles looked lousy. The plastic’s poor appearance had been exacerbated by my accidental brushing with wax when I was waxing the paint.

    I have tried a lot of products to make the plastic look better. They would all look only okay when done and then quickly fade to their previous bad appearance. I was unhappily accepting there was nothing I could do about it.

    One product I had never tried was Turtle Wax Trim Restorer so I decided it give it a try.

    Application

    I started with the worst areas first — the area at the base of the windshield. I started applying it and took a picture of how the applied area compared to the faded plastic.

    Restoring auto trim - The DIY Girl

    Then I did a test area on the rear bumper and let it sit overnight.

    Restoring auto trim - The DIY Girl

    The next day I went hog wild. I applied another coat on the wiper area, I finished the rear bumper, I did the entire front bumper and the black honey comb grill. I moved to the sides and did the side mirrors and the plastic that holds them to the vehicle, I did the door handles, the running boards, plastic strips that run along the bottom of the door, the side steps that wrap around to the rear bumper. I checked the front of the luggage rack and found it was also faded plastic so I coated it and the brackets that hold the rest of the rack. Lastly I did the plastic where the windows slide up and down.

    The package says to apply the restorer, allow it to sit for 10-15 minutes, and then wipe with a microfiber cloth. Microfiber doesn’t absorb so all that did was wipe it around without removing the excess. That worked fine for the areas needing additional coats, but I didn’t want the finished areas to get gooey by letting the excess sit there. When areas were completely restored I wiped them down with a cotton towel to remove any excess.

    Results

    What I found is there are very different types of plastic on my one vehicle. The front bumper needed one coat to be restored to beautiful color. The door handles needed about three coats. The uber faded wiper area needed five coats. The cool thing is I didn’t know the wiper area and door handles were black — they were so faded I thought they were gray. Now they look like new black plastic. Don’t expect all areas to react the same — go by appearance and keep putting on coats until the color looks great.

    Side step before – don’t know if you can tell how really faded and nasty it looked.

    Restoring auto trim - The DIY Girl

    Side step after using restorer – in person it looks gorgeous

    Restoring auto trim - The DIY Girl

    Wiper area after – it’s black now!

    Restoring auto trim - The DIY Girl

     Front bumper and grill look awesome.

    Restoring auto trim - The DIY GirlThe front of the rack looks like new.

    Restoring auto trim - The DIY Girl

    Now the real test is how long it lasts. The package says up to 3 months. I will post an update on how it holds up and how long it is until I feel the need to treat it again.

    I think it looks great for an eight year old vehicle 🙂