I wanted to post pictures of some of the pvc dog cots that have been made. If you have used the tutorial to make a dog cot I would love to post pictures of your project and pets as well so send me an email. I’ll add more images as I receive them.
Kristin in Ontario
Kristin ordered a couple slings for her dogs Keely (fox red Labrador mix) and Ranger (brindle boxer-Wheaton terrier mix). The captions are Kristin’s from Instagram. I had to resist the urge to download 50 pictures because they were all so cute.
[nggallery id=12] Lisa in Colorado made a pvc dog cot (I sewed the slings for her) for Jenell. She couldn’t find the corner fittings in 1 1/2″ so she went with 1″ PVC and she said its supporting Jenell just find. I found out Jenell is part of a large family – 4 dogs, 5 cats, and 2 guinea pigs, most of which are rescue animals. As you can see, Jenell isn’t the only pet to like the PVC dog cot.
[nggallery id=10]
Crystal is the owner of P-King Kennels in Sarnia, Ontario and contacted me about making the dog cots to be used in the kennel She has had a little chewing of the fabrics slings, but overall is happy with the cots. Here’s some pictures of her cots and guests at the kennel.
[nggallery id=9]
Debbie and her husband are making a cot for their dog Lily.
Donna made two small cots for her dogs Pepe, Tawny, and Tia.
[nggallery id=7]
Tarah is making a variety of sizes as a fundraiser – here’s her first dog cot.
I hate the toaster sitting on the counter. I had the hood for the Black and Decker Space Saver toaster in Texas and loved having the toaster oven hanging, but oh my god what a difficult install. The front edge of the hood scratched up the bottom front edge of the wall cabinet and getting the toaster to actually hang from the hood was a nightmare I wouldn’t want to try again. Moot point since they no longer sell the space saver toaster oven.
Some may be cringing that having the toaster oven right under the upper cabinet isn’t safe. After many years of having one hanging with no problems, having never set a toaster oven on fire, and knowing I have put things on top of my current toaster oven while in use with nothing melted all make me not worried. I wanted a toaster oven shelf and the counter clear underneath.
Planning
This isn’t a true “before” picture, but after my first failed attempt to get the shelf brackets level
After deciding where I wanted the shelf I hung black construction paper cut the size of the toaster oven from the front edge of the cabinet and lived with it a couple of days to make sure I would like it.
There is an electrical outlet that would interfere with where the shelf would hang. I obviously need the outlet so the toaster oven could be plugged in, but I wasn’t sure what to do about the shelf.
Installing the brackets
I installed the brackets and had everything go wrong. One of the wall anchors went right through the wall which left a hole and no way to add a fastener for the lower hole of the right bracket. Oh joy. I thought maybe a well installed anchor in the top hole would be good enough (foolish thinking for a shelf that would hold an appliance). I finished getting the brackets up only to discover they weren’t level. I was so disgusted that after getting all the anchors out I packed up my toys and put them away for the day to ponder my dilemma. Actually I was pouting, but pondering sounds so much better. I had 4 big holes to fill and since they wouldn’t be usable a second time I had to figure out where I could hang the brackets.
Round two for installing the brackets
Okay, let’s try this again. I couldn’t get a level against the drywall because of the electrical outlet so I temporarily pulled it out (with the power turned OFF). It hadn’t been installed all the great and I wanted to get in better position anyway.
I got the left bracket up and the top screw for the right bracket and did a sanity check. Guess what — they weren’t going to be level again. I took the brackets down and checked the holes in the back of my Rubbermaid brackets and they weren’t the same! No wonder. I had to do the holes differently for the right bracket to get the whole mess to be level.
The shelf
I had purchased a 24″ black Rubbermaid shelf and cut it a little shorter. The cut end would be almost against the refrigerator so not visible. I was kind of disappointed by the poor quality of the shelves in stock at HD — lots of chips out of the edges so I had to go through many to find a decent, yet still not perfect one.
I measured where the electrical outlet would fall and used a trim router to notch out about 1/4 inch strip a little wider than the outlet plate so there would also be room for the cord.
I had some black acrylic paint so I painted the cut edge, the notched area, and all the little chipped spots and let it dry.
Putting it all together
I put the shelf up and marked where the holes were in the top part of the brackets with a chalk pencil. I carefully drilled holes to make sure I didn’t go all the way through the board.
I plugged the toaster in and then slid the shelf into place so the cord would sort of be locked against the wall. I put small screws through the bottom of the brackets into the shelf so it couldn’t fall down.
I put the toaster oven in place with most of the cord tucked behind it. Here’s pictures of how it all turned out.
Now I need to buy more nautical charts so I can finish the backsplash behind the toaster oven shelf. Maybe should have done that before, but I’m not worried. I love having the toaster up off the counter now.
I’ve lived with it about a month now, using the toaster oven regularly, and the toaster oven shelf is wonderful.
I added small and medium dog slings on 2/10/2015 for people who don’t sew. Prices are for fabric slings only. The instructions on how to make the PVC frames can be found at PVC Dog Cot Tutorial.
Outside Dimensions
Price
Large
30 x 36
$58
Medium
24 x 30
$54
Small
18 x 24
$50
I’ve been mentally wrestling with this idea since Christmas and need to make a decision. The mental wrestling has been a result of really wanting to help out the non-sewers who have asked me to make dog cot slings for them, but feeling guilty about the price I have to charge so I won’t be giving my time away.
You probably should also be aware the first time I tried making slings for a reader who asked me she then refused to pay when they were ready to ship. Kind of left me with a “no good deed goes unpunished” feeling. It wouldn’t have been so bad if she simply told me she changed her mind, but instead she kept telling me over and over she would send the money. After weeks I got the point and gave up. When I finally sold the slings to others it was to really nice people who were fun to deal with and promptly paid. Thanks to them for the positive experience.
Explanation of process: If someone orders one I have to go to Joann to buy the fabric and matching thread. Get an okay from the person ordering that the color will work for them. Then I have to lay it out, measure and mark the fabric, cut the fabric, iron the hems, sew the hems, measure, mark and sew the loops, iron both pieces, request payment, arrange for shipping. It all takes time if you want nicely done dog slings. I just want you to understand I didn’t arrive at the price lightly. Even at $56 it will most likely work out to me making less than $10 an hour, especially when you factor in gas. This is not a mass production shop, but me sewing one at a time in my home.
Costs of fabric slings only for large dog cot frame only:
The picture shows the current price of duck cloth at Joann and the colors that were available the day of the picture (the black box in the upper right corner isn’t duck cloth so I blocked it out). I can’t promise every color will be available with at least 1 5/8 yard on the bolt. Some of those skinny bolts probably don’t have enough yardage on them. And it all depends on what’s in stock on any given day.
This is for the fabric slings onlyfitting the large dog cot frame. The corners and PVC are available locally so you would buy and assemble the frame and then add the slings when they arrive. The PVC pipe sides would be cut 32″ and 26″ for these slings.
I do have 8 corners if anyone can’t find them. They are $3 each and I would need to ship in a larger box so shipping would be higher.
The above cost is based on the current price of duck cloth and thread at Joann and subject to change. I know Joann has coupons, but I can’t count on that so I have to go with the list price.
I applied for a FL sales tax certificate, but only FL residents would be subject to that.
The shipping cost is based on my ability to cram the slings into a Priority Mail™ Padded Flat Rate Envelope and subject to change if I am not able. If anyone has cheaper shipping options I’m open to ideas.
It would be 10 days from time of order to request for payment. When payment is received I will immediately arrange for shipping. If I can get them done sooner, I would ship as soon as they are completed.
Color — always keep in mind your monitor may not be showing the same color as my picture, so color can be close, but not exact unless you go to Joann and see it in person.
The duck fabric is sturdy 100% cotton and can be washed and dried.
How to order
Please use the contact page to email me. Tell me which color in the picture below – I numbered the top and bottom row so tell me “top row 8 dark brown” or “bottom row 14 purple” as examples. Please send two colors in case your first choice isn’t in stock. Be descriptive since getting the right color will make me nervous. I will get back to you about availability once I go to the store.
Payment
I prefer QuickPay through online banking since there are no service fees involved and I’m trying to keep the price down. I will send a payment request to your email address. If you have other suggestions for payment, let me know.
I would love to have payment in advance of sewing, but just don’t feel right about that. Once the order is placed I will start making the slings and have them ready to ship in a maximum of 10 days. I will send a request for payment and the slings will ship as soon as the payment is received.
If anyone has questions or concerns don’t hesitate to contact me. Happy to answer questions and open to discussion.
Large, Medium, and Small sizes available
I went ahead and made frames for medium and small (as well as the original large) and will be selling the slings in all three sizes at the prices listed above.
Still not sure?
Here’s a link to a thank you post one of my reader’s (and purchaser of the dog cot slings) posted on her blog Keely and Ranger’s Dog Cots.
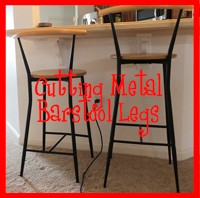
I moved from a house with a bar height bar to a counter height bar. I have great sentimental attachment to the bar stools I have to the point I don’t really care if the “go” with the house and decor, I can’t part with them — too many memories when I look at them. Maybe you found a great deal on bar stools with metal legs at a thrift shop but they are too tall for where you want to use them. There is a remedy.
Research
I found a good starting place with an ehow article How to Cut Metal Bar Stool Legs so I knew it was possible. I should have taken the advice offered in the article…
Look for 24″ high stools for a 36″ counter and 30″ high bar stools for 42″ high counters.
Then I needed to know how much room should be between seat and bottom of counter for user comfort and found this at HowtoDecorate.com:
Keep in mind you need 9″-13″ between the seat and the counter for seating comfort.
Now I knew how much I wanted to cut off, but didn’t relish the idea of using a hacksaw on 8 legs.
Methods tried
Keep in mind I had a little room for scratches since I planned on replacing the rubber legs tips when I was done cutting and they would cover any scratches right at the bottom of the legs.
The easy tools – tubing cutter and multi-tool. Both were failures.
I decided to try a power tool first in hopes it would quickly whisk the 8 legs off. I taped and marked the legs to prevent damage and found the multi-tool bounced all over the place before actually biting in and starting to cut. This could be the result of my lack of experience and a more experienced user might have much better luck. With great disappointment I decided that was not the way to go.
Next was the copper tubing tool I had from plumbing projects. It worked great on consistent diameter tube. It does not, however, work great on tapered tubing like the legs. I spiraled down the taper and there was no way I would get an accurate cut. I again set a tool aside with great disappoint.
What actually worked
The dreaded hack saw. I went to work with the hack saw, and while not fun, I cut all the legs off and corrected the bad cut from trying the copper tubing tool and both stools were mostly level when placed on a hard surface. I had one leg that was just a little short.
Leg tips
I had hoped to reuse the leg tips. Unfortunately, once cut the leg diameter went from 1/2″ to 5/8″. I wondered how much trouble I would have to go to to find 5/8″ black rubber legs tips. On online search showed HD and the hardware store were a waste of time. I have found that L may have things on their website and not in there stores. I almost jumped and down with joy when I walked in and found 4 packs of 5/8″ rubber tips in black.
Now for getting the buggers on.
Attaching the leg tips
Okay, so maybe the tubes were a tad over 5/8″ and the legs got wider where the tops of the tips would sit.
I had figured I could correct the the short leg by adding washers to the bottom of that leg tip. Then I decided washers would also prevent the ends of the legs from working their way through the legs tips over time so I bought a pack that fit perfectly into the leg tips. I used the handle of a wooden spoon to force the washers down into place.
It pretty much took brute force to start the leg tips and a hammer to get them all the way on. Good thing there were washers in there to prevent me hammering right through the bottom of the tips. All 8 tips on are. Man, I hope I never want them off. I would probably have to cut them off. On the bright side — I don’t ever have to worry about them falling off and the stools are nice and level.
So pleased
I don’t know if I may at some point paint the metal or the wood, but I do know when I put those stools in place and stepped back to look at them I just smiled. Silly how attached you get to things, but I am so glad I found a way to make them work with the shorter counter height and people will actually be able to sit on them 🙂
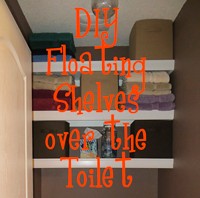
I have a house with no linen closet, but it does have a room for the toilet. I removed the towel bar that was over the toilet because I couldn’t see what good towels would do there since it was so far from the sinks and shower and badly wanted shelves or a cabinet for linen storage. Here’s the before picture.
Yawn…. is that not the most boring room you’ve ever seen.
The problem, that doesn’t show in the before picture, is the exhaust fan that’s not that far from the back wall that I felt eliminated the possibility of a closed cabinet — so that left DIY floating shelves over the toilet.
I had already painted the bathroom and removed the useless towel bar shown in the picture.
Lumber
The next stumbling block came when I wanted 3 42” wide by 16” deep shelves and hated to buy an entire sheet of plywood and have to store the remainder.
When I am in the lumber area of Home Depot I always cruise by to check the discounted lumber bin. It almost always horribly warped stuff that I couldn’t see any use for at all. Last week I checked and it had a sheet of birch plywood that had been split unevenly lengthwise. I asked the guys what was wrong with it and they said someone made an error and didn’t make the cut half way so they were discounting the pieces. $15. OMG. For a sheet of beautiful birch plywood.
I raced home and got the measurements of what I needed and raced back. They cut the three shelves and 2 2” strips that I could fasten to the wall and not have to buy 1” x 2”.
$15! I was excited.
Okay – so I splurged and bought vinyl 2 ¾” trim for the front edge that was $6.96. for each 8’ piece. All I would have to do is cut it, nail it, and fill the nail heads and I’d be done. Woohoo.
Planning
From this point forward I will always, ALWAYS measure, plan, and write down measurements BEFORE purchasing materials.In my haste to get the plywood before someone else bought it I made two errors. I had them cut the shelves 1 inch too wide and I had them cut 2 2″ strips where if I would have planned I would have known I needed 3. So I had a lot of correcting to do before I could get started.
On the bright side — 1 inch to wide is a heck of a lot better than an inch to narrow and this mess put me in the position of finding out what my new sliding compound miter saw could do.
Here’s the planning I did after the lumber was cut and purchased…
Have I ever mentioned that as a career accountant I still do all my thinking in Excel? Anyway — it was at this point I realized I was short on 2″ material and the shelves were too long.
When I finally sat down to work out the plan I knew if someone taller than me used the toilet I didn’t want them bonking their head on the bottom shelf when they sat down. I figured the bottom edge of the bottom shelf should be at standard cabinet height which is 36″ for countertops plus 18″ for space between which equals 54″. That left me with 3 shelves that were 2 3/4″ and 11 1/4″ above each shelf.
NOTE: measure both the back corner where the shelf will go as well and the front edge before cutting lumber. My walls were a solid half-inch narrower at the back than they were at the front. I cut the boards the narrower measurement since the front trim would hide the gap between the shelf and the wall. More talented people than myself might angle cut the shelves — I don’t know.
So now I had the golden opportunity to find out what my 10″ sliding compound miter saw would do. With the aid of the laser light on it I was able to successfully cut an inch off all three 16″ shelves. It wasn’t absolutely perfect, but since the ends would be against the wall it would be fine.
I had the 2″ mounting strips for the 2 back pieces and 4 of the sides. I used a 16″ scrap from the shelves and cut 2″ strips. These turned out surprisingly well. I am pretty tickled with my saw.
I sanded, primed, and painted the 2″ strips and both sides of the shelves planning to touch up where needed after all were installed.
Shelves sanded, primed, and painted and waiting to be installed
Hanging the floating shelves
This picture shows the planned height of the shelves with green boxes and the location of studs with red circles. Of the six attachment points needed there were only 3 studs to be found. I have since found out that 16″ on center is only required code for load bearing walls so builders can feel free to cheap out on lumber on non load bearing walls and my builder took that permission seriously.
I will now try to NOT go on a rant about the construction at my house. Absolutely none on the left, thankfully 2 on the back and one on the right. I’d have to use hollow wall anchors where there are no studs and then screw securely into where there are studs. With the weight distributed across the shelves they should be okay and I don’t plan and an enormous amount of weight on them (this thinking prove faulty later in the process).
The only difficult thing about floating shelves is making dead certain the support boards are level when installed. I triple checked this before proceeding on each piece and it paid off.
Level chalk marks for back support boards
I installed the back pieces first after making a chalk mark where the top of each support should be. I ended up adding a chalk mark for the bottom of the top piece since I couldn’t see the top. I had a level on top of the support boards the entire time I was attaching them to make sure it was level.
I attached the back piece first starting with the top shelf and working down. Then I attached the side pieces making sure all was level. Okay — I got impatient and slid the top shelf in as soon as all three supports were installed because I wanted to see.
I forgot to take a picture earlier…
I painted the shelves before hand so it was a matter of inserting them so they rested on all three sides and then I nailed them down to the supports.
Adding the trim and another unanticipated problem
I wanted the supports hidden so the plan was to add 2 ¾” trim to the front edge of each shelf. I put a board on the shelf that extended over and made sure the trim was tight against the bottom of that board before nailing to the front edge of the plywood. The trim on the top and middle shelves went fine and then I couldn’t get the bottom one to line up. What was going on???
I realize when I lined up one end the other was too high and I couldn’t make it work. I stood back and saw the problem — that shelf had seriously warped for some reason so there’s was no way to flatten it and attach the trim. Why would one shelf warp when the others were fine? One of life’s little mysteries.
Remember when I said the shelves would never hold any serious weight? The DIY gods were laughing at me. I went and got a couple of weights. 16 pounds did nothing to flatten the shelf. I add 2 more for an additional 24 pounds. 40 pounds and nothing. I went and got a 25 pound dumbbell and finally 65 pounds of weight flattened the warped board down so I could GLUE and nail the trim. I glued all 3 pieces of trim, but I really glued this one and left the weights for several days. I removed the smallest weights and waited a day to see if the shelf bowed. Removed the next size weights and waited and finally removed the 25 pounder. Everything has stayed in place. Sheesh – who knew?
65 pounds of weights needed to flatten warped bottom shelf
I filled the nail holes, caulked everything and touched up the paint and done.
Finished shelves
I think it looks like I’m play tic tac toe with stacks of towels and cubes in the pictures below. I stuck a couple of things temporarily on the bottom shelf until I figure out what decor items I want there permanently and I’m hesitant to block the exhaust fan above the top shelf.
So I have a question. I see DIY projects online like bookcases and shelves that are then tastefully appointed with a smattering of gorgeous decor items. Don’t these people need storage? Don’t they have books, and keepsakes, and family pictures — sentimental stuff that isn’t gorgeous but priceless because of the memories? I built these shelves because I need storage. The shelves are loaded with towels and sheet sets I didn’t know where to store before. Am I the only one like this?
Anyway — here’s the finished shelves and despite the challenges (polite way of saying mistakes :-)) I am very happy with how they turned out. Much better use of that space than a silly towel bar which I solved with the coat hook ledge shelves in a previous post.
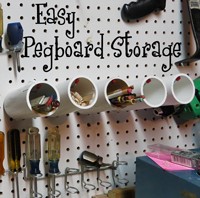
I’m not sure where I ran across this pegboard storage idea, but it’s not mine. I saw it in a picture somewhere and thought how simple – the small items I dig around in drawers for could be right there handy for me to grab. Actually – what I really thought was “Duh — I can’t believe this never occurred to me.”
I found 3 packs of pegboard hooks at Walmart for under $2. I had leftover PVC in the garage from making the dog cots. I cut 6″ pieces and voila! Storage for small items. It took all of five minutes.
I haven’t decided what all I’m going to put in them yet, but box cutters will be in one of them since I always seem to be digging around for those.
By the way — I used the 6th peg to stick a roll of paper towels on so that’s not sitting on my workbench any more but is handy for me to grab one when I need it.
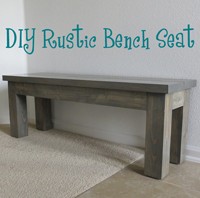
This was a test project and if this DIY rustic bench seat was successful my next project was going to be a new table for my living room made basically with the same plan.
This was going to be a “rustic” bench seat partly because you can’t get 4 x 4 lumber without knots so that dictated the lumber for the rest. Clear pine wouldn’t go with knotty legs.
I thought it odd I ended up spending almost as much on screws as I did on lumber but I used self-tapping, quality screws that were easy to put in without pre-drilling. But still, less that $40 for a big, beautiful bench? I think it’s a deal.
I wanted glued and screws construction for strength BUT I didn’t want so much as one screw showing on the outside. Exposed connectors was not the look I was going for and I have not mastered the whole pocket hole screw thing as of yet. That’s not how the bench worked out.
Gluing before screwing is assumed in all the steps as well as using clamps and other tools to ensure squareness.
I wanted a 48″ bench so it would only require buying one 2 x 8 that would be cut in half for the top – the top, or bench seat, will measure 15 by 48. Finished bench will sit 17 1/2″ high.
I wanted an inch overhang on all four sides so the assembled legs, frame, and aprons would have to measure 13 by 46.
Steps in construction
Cut legs to desired height, strap the legs together standing up on each end and use power sander to sand ends uniform and level on top and bottom
Attach spacers 3/4″ in for end aprons – make sets for each side and screw in with 2 1/2″ screws. If you make all four legs exactly the same you won’t be able to attach the apron pieces, so reverse 2.
I attached the end aprons next making sure everything was square screwing through the spacers from behind into the aprons – two 2″ screws on each end of apron piece.
Measure back of leg assembly to verify 8 1/2″ frame piece will leave 2 1/4″ open on each leg to attach front and back frames (2 x 4) and then aprons (1 x 4) or 1 1/2″ + 3/4″ = 2 1/4″.
Making sure everything is square, screw end frame pieces into legs – 2 screws through each leg with 2 1/2″ screws
The neighborhood kids thought the grain was so beautiful on the ends of the legs and were sorry it would be covered up on the finished bench. I agreed with them.
I took the coward’s approach here and cut my 2 x 8 for the seat of the bench to make sure it would be exactly 48″ before completing assembly of bottom. The 8′ board was actually 96 1/4″ so after cleaning up the ends and cutting in half I had exactly 48″ boards. Woohoo!
Making sure everything is square, screw front and back frame pieces into ends of side frames with 2 1/2″ screws.
Turn bench upside down and place brace pieces at top edge (on the floor) of frame and use 2 screws in each end to attach to frame with 2 1/2″ screws. These screws will be hidden by the apron.
Measure (mine ended up being 39 1/16th for tight fit) and cut front and back aprons and insert in place – screw from back with 2″ screws that will go through frame and into apron.
Use pocket hole screws to connect 2 48″ 2 x 8 boards in several places (this is optional).
Lay top (bench seat) down on floor making sure you have the side down that you will want to have showing on the finished bench (put on cardboard or something to prevent scratches), center base on seat – screw through 3 braces with 2 1/2″ screws, 2 screws at each end of braces.
Flip it over, sand and finish with paint or stain of your choice. At this point I didn’t have any nail hole or screw heads to cover up. That changed.
First problem encountered – warping
The boards for the bench were firmly attached by screws from the bottom through the cross braces. of course there was no way to screw from the bottom through the corners, so after a couple of days all four corners had lifted and the top was visibly warped.
Need I say how disappointed I was as I sunk 4 screws into my previously unblemished top to flatten out the warped boards? I buried the screw heads into the wood, filled, and sanded them smooth. So much for my hope to have no visible screws. My guess is an experienced woodworker would have known this wouldn’t work, that it’s the nature of pine to warp.
Next problem encountered – “corning”
I sanded the heck out of the bench with my little palm sander and it looked and felt perfectly smooth. I thought it looked gorgeous.
I used the Minwax Classic Gray stain again on this bench. After the first coat I was utterly appalled by how the bench looked. Not the color, but all the minute scratches in the wood that looked like someone had taken a highlighter to accent them. Where did they come from?
This is zoomed in and I had to up the contrast and drop the brightness of this image a lot so the scratches would show. Believe it or not, I couldn’t feel those scratches.
I ran out and looked at my palm sander that still had the last piece of sandpaper I had used on it. There were little dots on it.
Ever heard of “corning”? While it had happened to me before, I didn’t know what it was called until I researched to find out what had happened this time. When it happened to me before it was while sanding a painted surface. This was the first time on raw wood. Sanding residue has solidified into little dots stuck to the sandpaper and cut scratches into the wood.
I sanded — this time by hand since I was afraid of the palm sander – and sanded. Those stained scratches would not come out. I felt I had reached the point of the ridiculous with sanding so I added another coat of stain and the scratches faded. A third coat of stain and they were gone. The bench was just a hair darker than I would have liked, but I could definitely live with the color a whole lot easier than the scratches.
By the way — I couldn’t find a solution to corning. I was using quality sandpaper and other than change it every 30 seconds, I don’t know how to prevent it from corning. Maybe not use the palm sander, but that means a much lengthier process to hand sand.
Finishing
I put multiple coats of water based poly on. I started with the bench flipped over and did the bottom and the legs. The I put it upright and put several coats on the top. Water based poly has to be put on in extremely thin coats. I use a small plastic dish and a folded piece of microfiber towel to apply it. Wipe it on and stop — don’t go back and forth because it dries too fast. Do a lot of really thin coats to avoid runs.
I am going to switch to oil based poly for my next project and thin it with 50% mineral spirits and use the same basic technique.
I set the bench in place with the plan to not use it (hit it, bump it, put anything on it) for 30 days so the finish can cure.
I painted some crates so I could store hats and shoes under the bench (no guest closet in the house) but the jury is still out on whether I like them. Do they need casters or what? I’m not sure about the crates, but I absolutely love the bench and have already designed a table for the living room (taller and wider) and plan to start that soon.
I think the 48″ bench looks great under the 60″ coat hook shelf I made
I thought I’d give you my 2 cents worth and do a blender review.
I don’t really use a blender for much other than smoothies, but I am a devoted consumer of protein smoothies so my blender gets used almost every day for lunch. I need one that crushes ice easily, is fairly easy to clean, and holds up well under a lot of use. Once again, I am not sponsored by either company so this is unbiased by money, but it is biased by experience.
There’s no doubt that Kitchenaid blenders have a motor that does a great job of pulverizing ice. Where Kitchenaid has failed on two consecutive blenders is in the blending container. The first one had a rubber washer that would get moldy and gross and need to be replaced. The last time I called Kitchenaid to get another rubber washer they said the blender was a poor design (no kidding) so they discontinued it and wouldn’t even sell parts anymore. A ploy to force you into getting another blender? It worked for me. I wasn’t using a blender that was sealed on the bottom by a moldy piece of rubber.
Next Kitchenaid blender the seal failed around the turning part for the blade and there was no way to repair or replace it. I gave up on Kitchenaid at that point. Their blenders aren’t cheap and if they couldn’t build a container that lasts I was going to try another brand.
Which brings me to the Ninja. I have to admit that when I first tried it I thought it was a pain in the butt. The container has to be locked on to the base. The lid has to be put on the container with the lid arrow lining up with the arrow on the handle of the container. The lid has to be locked down. Fail to do any of these three properly and the power button will not come on. Having used the Ninja for a while, this just isn’t a big deal anymore.
KitchenAid KSB1570SL
Intelli-Speed™ Motor Control – The Intelli-Speed® Motor Control senses contents and maintains optimal speed to power through all ingredients.
5 Speeds/Crush Ice/Pulse Mode – Stir, chop, mix, puree or liquify. Pulse mode works with all speeds for staggered blending, while the crush ice feature pulses at precise intervals for optimal ice crushing results.
Soft Start® Feature – The Soft Start® Feature starts the motor at a slower speed to pull food into the blade then quickly increases to the selected speed setting.
Ninja Professional Blender (NJ600)
Soft Start® Feature
The Soft Start® Feature starts the motor at a slower speed to pull food into the blade then quickly increases to the selected speed setting.
Model – NJ600
Power – 1000 Watts
Speeds – 3 Speeds + Pulse
Blender Pitcher Capacity – 72 oz. (9 cups)
Blade Technology – Total Crushing Technology
Warranty – 1 Year
BPA Free
Dishwasher Safe
Whats in the box? 1000 Watt Motor Base, 72oz. Blender Pitcher, Blender Pitcher Lid, Total Crushing Blades, Instruction Book, Quick Start Guide, Inspiration Guide
Blending
The blades on the Kitchenaid blenders were permanently installed in the bottom of the container and it’s what failed on both blenders I owned. The Ninja has a set of removable processing blades. The blades are exactly like my food processor only more blades and taller. It’s nice the blades are removable for cleaning.
What’s not so nice is the consistency of my smoothies. The Kitchenaid blenders were true blenders and everything came out with an extremely smooth “blended” consistency. The Ninja processes like a food processor and the food is chopped up more than blended. I have to admit I prefer blended.
The the blades in the Ninja do a heck of a job chopping ice though. Not sure why the fruits I put in the smoothie are a different texture while the ice is certainly pulverized.
The Ninja container has a very dark green cast to it and I suspect there are some kitchens it would not look good in because it might clash with decor colors. Look at it before buying.
Cleaning
I love the removable blades on the Ninja — it’s so much easier to get everything really clean so that’s a big plus for the Ninja.
Durability
Kitchenaid pretty much proved to me they don’t hold up. The containers on both failed and the motor was going on the second one — but that could have been caused by the leaking container that allowed food and liquid to seep down into the motor.
Time will tell, but I hope it’s possible to order parts for the Ninja. Like if the blades start to fail or if the part that turns the blade starts to leak, maybe you can get replacements. Of course, the motor is the key — it doesn’t matter if the container and blades hold up if the motor fails, but so far I’m glad I made the switch to Ninja.
This turned out to be a huge post. The text is details for newbies if they want to do their own shelves or you can skim through the pictures.
Right this moment I am reeling from the total beat down hanging the largest 60” shelf turned into. Don’t get me wrong. These shelves are easy and so awesome to custom fit exactly to the space you want them.
Now having made several – and I am new to woodworking – I don’t think buying a ready-made ledge or coat hook shelf is a good buy. Not when you can make them at a far more reasonable cost and have the custom height, depth, and width you need for each specific space.
My problem: no storage space
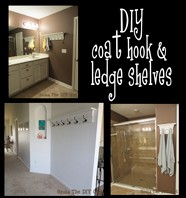
I moved into a house with no storage and most notably lacking any kind of guest closet. Where do you hang the jackets or coats you wear on a regular basis. Where do you hang jackets or coats for guests. My solution was coat hook shelves with ample hooks for hanging and a 6” deep shelf to put things like decor items.
Next came a master bathroom with no towel bar. Seriously? Where the heck are you supposed to hang towels? I solved the problem for the short-term by hanging my bath towels on the shower door, but hated how that looked. I have a beautiful shower and wanted it to show unobstructed by towels.
I kicked around the idea of doing board and batten in the entry and bathrooms since I love the look, but in the end I felt baseboards made it a deal breaker. To complete the look I would need to pull builders grade basic baseboards and replace with something more substantial and that was a financial deal breaker at this point. So my shelves would not be the nailed to the wall as the top shelf on board and batten. I would have to be able to hang them. The good part of this is they could go with me if I move.
Test project: 30” shelf by door to the garage
I made the first 30” shelf to hang by the door to the garage so I had a place for my purse, sunglasses, and jackets. It was my first project with my air compressor and nail guns. Along with my compound miter saw I couldn’t believe how quickly and easily the coat hook shelf went together.
Cost of entire project
As of this writing you can get 1” x 6” common boards for around $10, 1” x 8” common boards for around $12-13, and I paid $.80 a linear foot for basic primed baseboard. I also used boards from a shipping crate I had torn apart. I strongly encourage the use of scrap wood whenever possible.
A note about the trim you use: I know a lot of people love the more expensive crown molding. If you decide to go that route purchase your hooks (if this is to be a coat hook shelf) and measure how much clearance you need to be able to hang things on the hooks. You may have to use something larger than a 1” x 8” back board. I really like the way the simple molding looks on my shelves and don’t think it needs anything more.
I also recommend getting the hooks in advance to see how they have to be fastened. For the black hooks I wanted the holes drilled before painting so I didn’t mess up the finished shelf trying to get the hooks in straight.
If you have the paint or stain you want to use on hand, the only thing left to purchase will be some sort of hanger. I used the Ook hangman cleat for the first shelf. It’s strong and works well, but the shelf isn’t flush against the wall. So for the last 4 shelves I built I purchased keyhole fasteners. More about keyhole fasteners later.
Materials
Back board against wall 1” x 8” common pine
Top shelf larger shelves 1” x 6” common pine
Top shelf for small shelves 1” x 4” common pine
Filler board behind trim 1” x 4” crate wood
Basic trim
Oiled-bronze GlideRite hooks (I sprayed them matte black)
Brushed nickel GlideRite hooks
Hooks are potentially your biggest expense – they were slightly over half of mine. I couldn’t believe some of the prices I saw and was thrilled I could get 10 packs of hooks from GlideRite.com. I love their hardware and have used it in a kitchen update and two bathroom updates as well. It’s decent hardware that doesn’t break the piggy bank.
I had all the paint, etc on hand so I didn’t have to buy any of that.
For less than $85 I built 5 beautiful shelves with the smallest costing $8 and the largest costing $33. Couldn’t find that in a store.
Steps in construction
Glue and nail filler piece to back board taking care to not nail lower than the filler board (I glued, clamped and nailed from the back). The filler piece should be the exact same length as the back board and a little wider than the trim board you selected.
Glue and nail top shelf to filler piece and back board taking care to not shoot nails past the tops of the boards. My top boards were 4″ longer than the back board so they would overhang the back and trim.
Measure and cut trim pieces and then glue and nail in place. Use a miter saw to make the cuts for the front corners.
Caulk trim and all seams
Fill nail holes on trim and top shelf with wood filler (the remaining holes are in the back and I don’t bother filling them)
Sand entire shelve unit until smooth enough to finish
Drill holes for hooks if necessary
Install keyhole hangers
Do test install of shelf*
Finish shelves with stain or paint (I used chalk paint and clear wax)
Attach hooks making sure they are all perfectly straight
*Learn from my mistake – hang the shelves before finishing. I will go into the nightmare hanging of the 60” shelf for my entry hall later in the post. Much pain and agony could have been avoided if I would have hung the shelves before finishing.
Using leftover crate wood to fill behind trim board
Painting the shelvesAttaching the black hooks to 60″ entry shelf
Hooks I chose for entry shelf $24.95/pack of 10 and bathroom shelves $19.95/pack of 10
Keyhole fasteners
If you want a flush mount install nothing beats keyhole fasteners, but you will need a Forstner bit and chisel to install them. The keyhole fasteners themselves aren’t expensive – I got them at Lowe’s The Hillman Group 2-Count Heavy Duty Keyhole Hangers $1.38.
Before I built these last four shelves I did a lot of research and decided on keyhole hangers. They’re more work, but they are economical and an incredibly strong fastener.
To install you have to drill 3 holes with a Forstner 5/8” bit and then chisel out to create an oval hole. The center hole should be a little deeper to accommodate the screw head. I do not have a drill press and just eyeballed the depth and they all worked out fine. Yes, fine woodworkers are cringing at my total lack of precision…
Moving location of keyhole fasteners to match where studs were in the wall
I didn’t have a chisel set when I did the last four shelves, but I did when I had to move the keyhole hangers on the 60” shelf. Oh my god, I could believe how easy a chisel made it. I got my set of 4 chisels and set of 6 Forstner bits at Harbor Freight for respectively on sale for $4.99 and $9.99. Not everything at Harbor Freight is good, so be sure to read customer reviews before buying — they will tell you if it’s junk or not.
Installing shelves on the wall
For the smaller shelves that wouldn’t be holding much weight I felt hollow wall anchors would be good enough. I used these for the 3 bathroom shelves since they would only be holding towels and décor items. Just measure precisely and level and install the screws in the wall. Then hang the shelves.
For the coat hook shelves that would potentially have to support more weight or people pulling on them I wanted a firmer install. For the 30” in shelf in the kitchen that I would hang my purse and jackets on I tried an Ook hangman cleat. It’s a strong support but the shelf isn’t flush to the wall and I really like flush to the wall.
60” shelf for entry
Oh my god, what a beating. I installed the keyhole hangers an inch from each end and installed hollow wall anchors in the wall. I hung the shelf – which was a bear doing by myself since it was so long and weighs a ton. I did a gentle tug and the shelf and wall anchors ripped right out of the wall and landed (thank god) on the ladder shelf I had used to assist me so the shelf wasn’t destroyed.
Fine. I ordered the larger Ook Hangman cleat that is 18” long and is supposed to hold up to 200 pounds. My assumption is that weight limit applies if mounted into studs.
So began my search for studs. I could find studs toward the ends of where the shelf would be but nothing in the middle. What???? I thought my stud finder was screwing up so I started tapping holes into the drywall with nails. Nothing. I went to the other side of the wall and searched for studs. Nothing. In my entry there is a 30” gap with NO STUDS. Quality construction. Geez. No stud and swiss cheese drywall from my search for a stud.
The cleat had to go into studs on both ends so now what? I stood back and looked at the patched holes from the wall hangers and the nail holes from my search for studs. Dear god. Now what do I try?
The only option I could see was moving the keyhole hangers to match where I could find studs 14” from the left end of the shelf and 19 1/2 “ from the right end.
After an enormous amount of measuring and double checking and triple checking I installed the keyhole fasteners to match the studs. I put long screws deep into the studs and tried to hang the shelf. Lo and behold after all the various disasters the keyhole fasteners matched the screws and the shelf was FINALLY firmly hung on the wall. Sheesh – what a beating.
This is why I say hang your shelves before finishing. I manhandled (womanhandled) that poor shelf up and down so many times. I felt I had to drill and chisel the new holes in the house resting on carpet so I wouldn’t rip all the paint off of it and then had that mess. I had to adjust the keyhole hangers up and down multiple times to get it level – I must have been in total brain-fart mode by that time. All I can say it was a total beating for me and the poor shelf. Hang the shelf before applying the paint or finish.
‘Nuf said.
I love the shelves
36″ bathroom shelf15″ ledge shelf with hooks15″ ledge shelf with hooks – finally a good place for bath towels60″ coat hook shelf for entry30″ shelf by door to garage for everyday things
When all is said and done I love the DIY ledge shelves. I have solved the problems of coat hanging for both everyday and guests. I have a ton of places to hang things in the bathroom. And all for around $85. You can’t beat that price for five shelves that are very classy looking and functional.
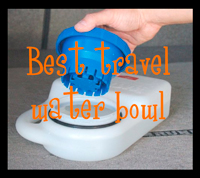
Image courtesy of Amazon (not my dog, not my vehicle). You will need to strap or bungee the bowl to keep it from sliding around
The Waterboy travel water bowl is hands down one of the best purchases I have ever made for my dogs. I think adequate hydration is important for everyone, including my dogs, and now I don’t have to worry about it whether we’re running around doing errands or on the road for a trip.
Gone are the days of the dogs only being able to drink at stops along the way. The Waterboy travels full of water and I can hear the dogs in the back of my SUV lapping up water while on the road. It stays in my vehicle all the time. Best thing? It doesn’t spill water.
The little blue bowl allows just a small amount of water into the bottom and refills as the dog drinks. That’s why there’s never enough water in it to slop all over the place. I love it.
My timid dog Ellie started using it as soon as I filled it and set it down on the kitchen floor before taking outside to my vehicle. My fearless dog Nikki looked at it with a baleful eye, sniffed it with disdain, and had an expression that said “I’m not drinking out of that thing.” When she got thirsty enough on our first trip with it she gave in and used it readily after that. So don’t expect every dog to be immediately thrilled with the little pool of water available at the bottom of the blue cup.
waterboy-ring
I have read reviews where people complain about leaking. The big black o-ring shown in the picture is like any other o-ring. It needs periodic maintenance in order to keep doing it’s job. Every once in a while I take the o-ring off, wipe all the accumulated dried slobber and crud off of it, wipe on a fresh thin coating of petroleum jelly and put it back on the bowl. It seals beautifully and my Waterboy never leaks.
There’s only one thing I had to add — the bowl was driving me crazy sliding all over the back so I have a small bungee cord on the handle that is hooked to the side of the cargo area. No more sliding and it’s right where the dogs need it.
I do still keep a jug of water stored in the SUV in case the dogs empty the bowl and there isn’t any water available, but it doesn’t hardly ever get used anymore.
Depending on where you get it, the Waterboy will cost you $15-20. It’s worth every penny.
I’m not sponsored by anyone so this is just the opinion of me as a dog owner.